OS Installation Guide
INSTALL OS
1. How to Install OS
Discover the eyeCloudXOAR feature, designed for users seeking seamless connectivity to cloud resources

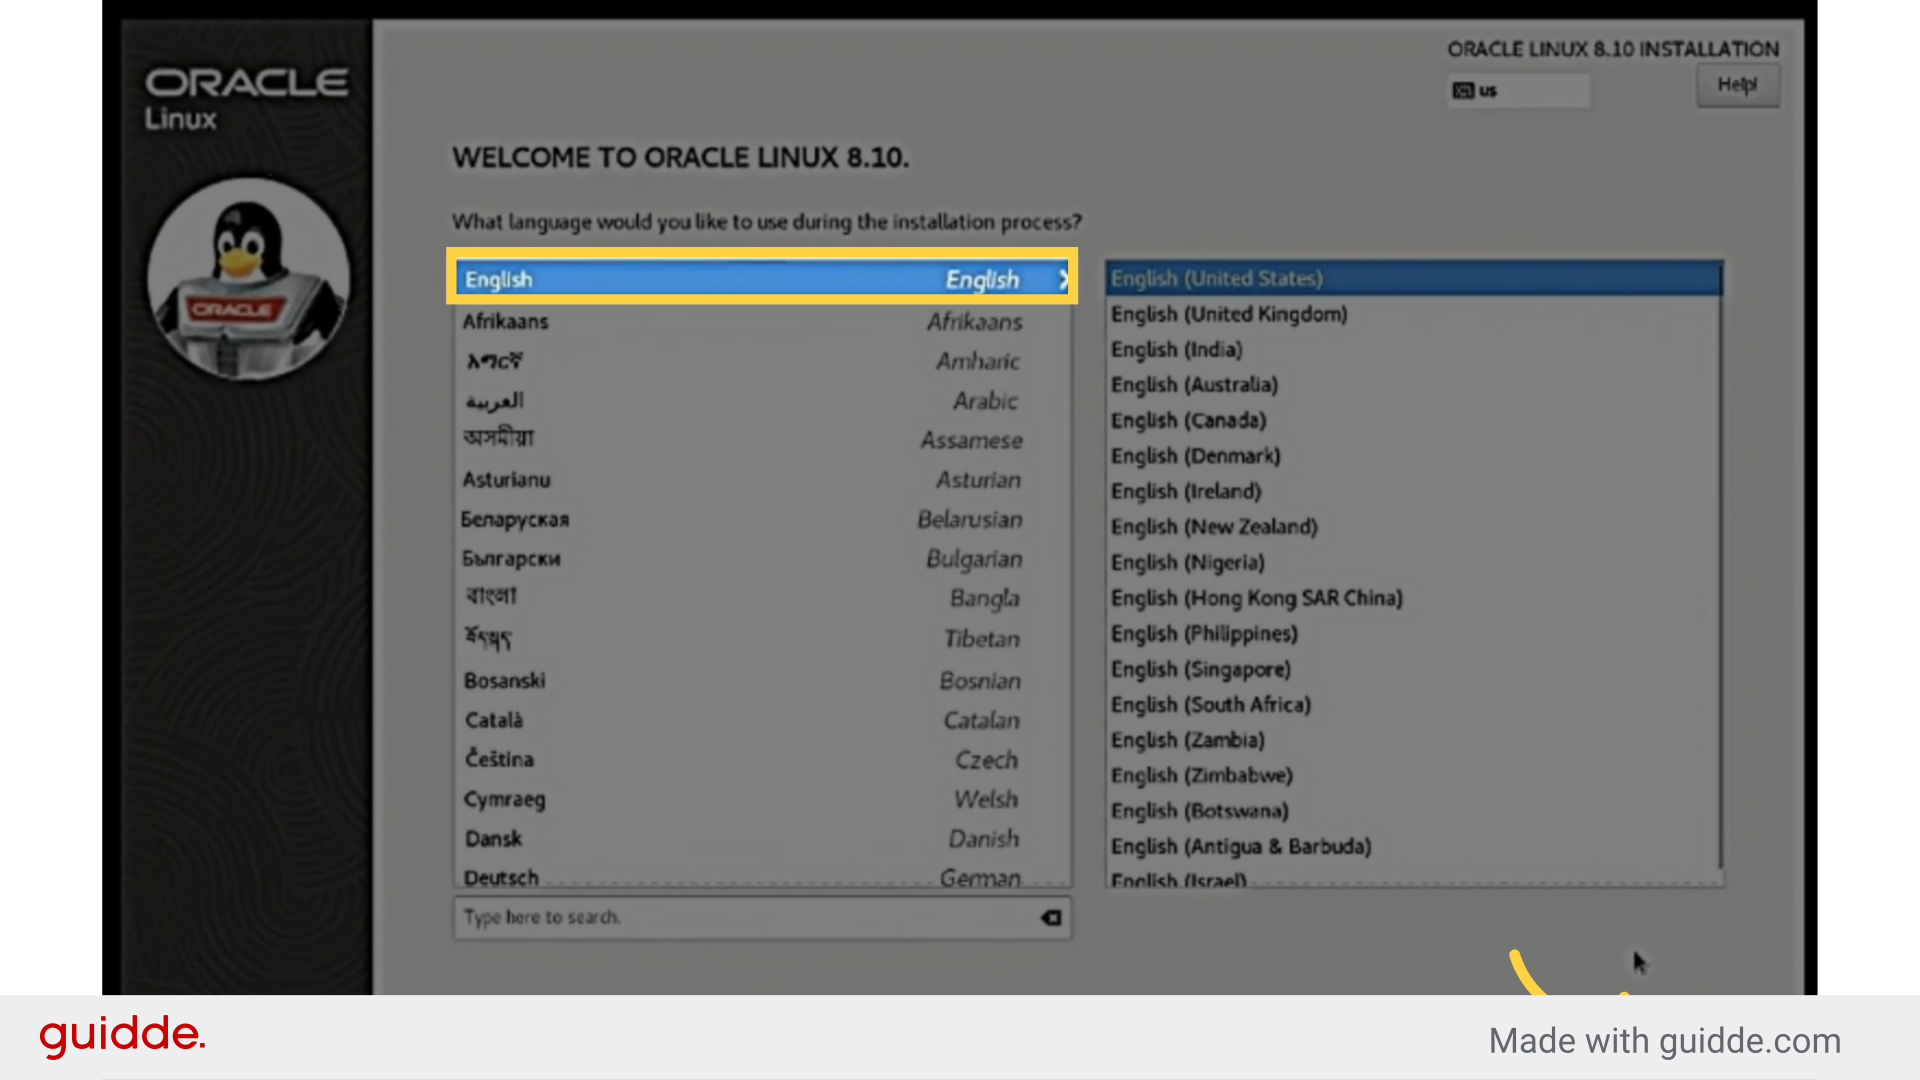
2. Select Language and click Contiune
Click on the specified link.
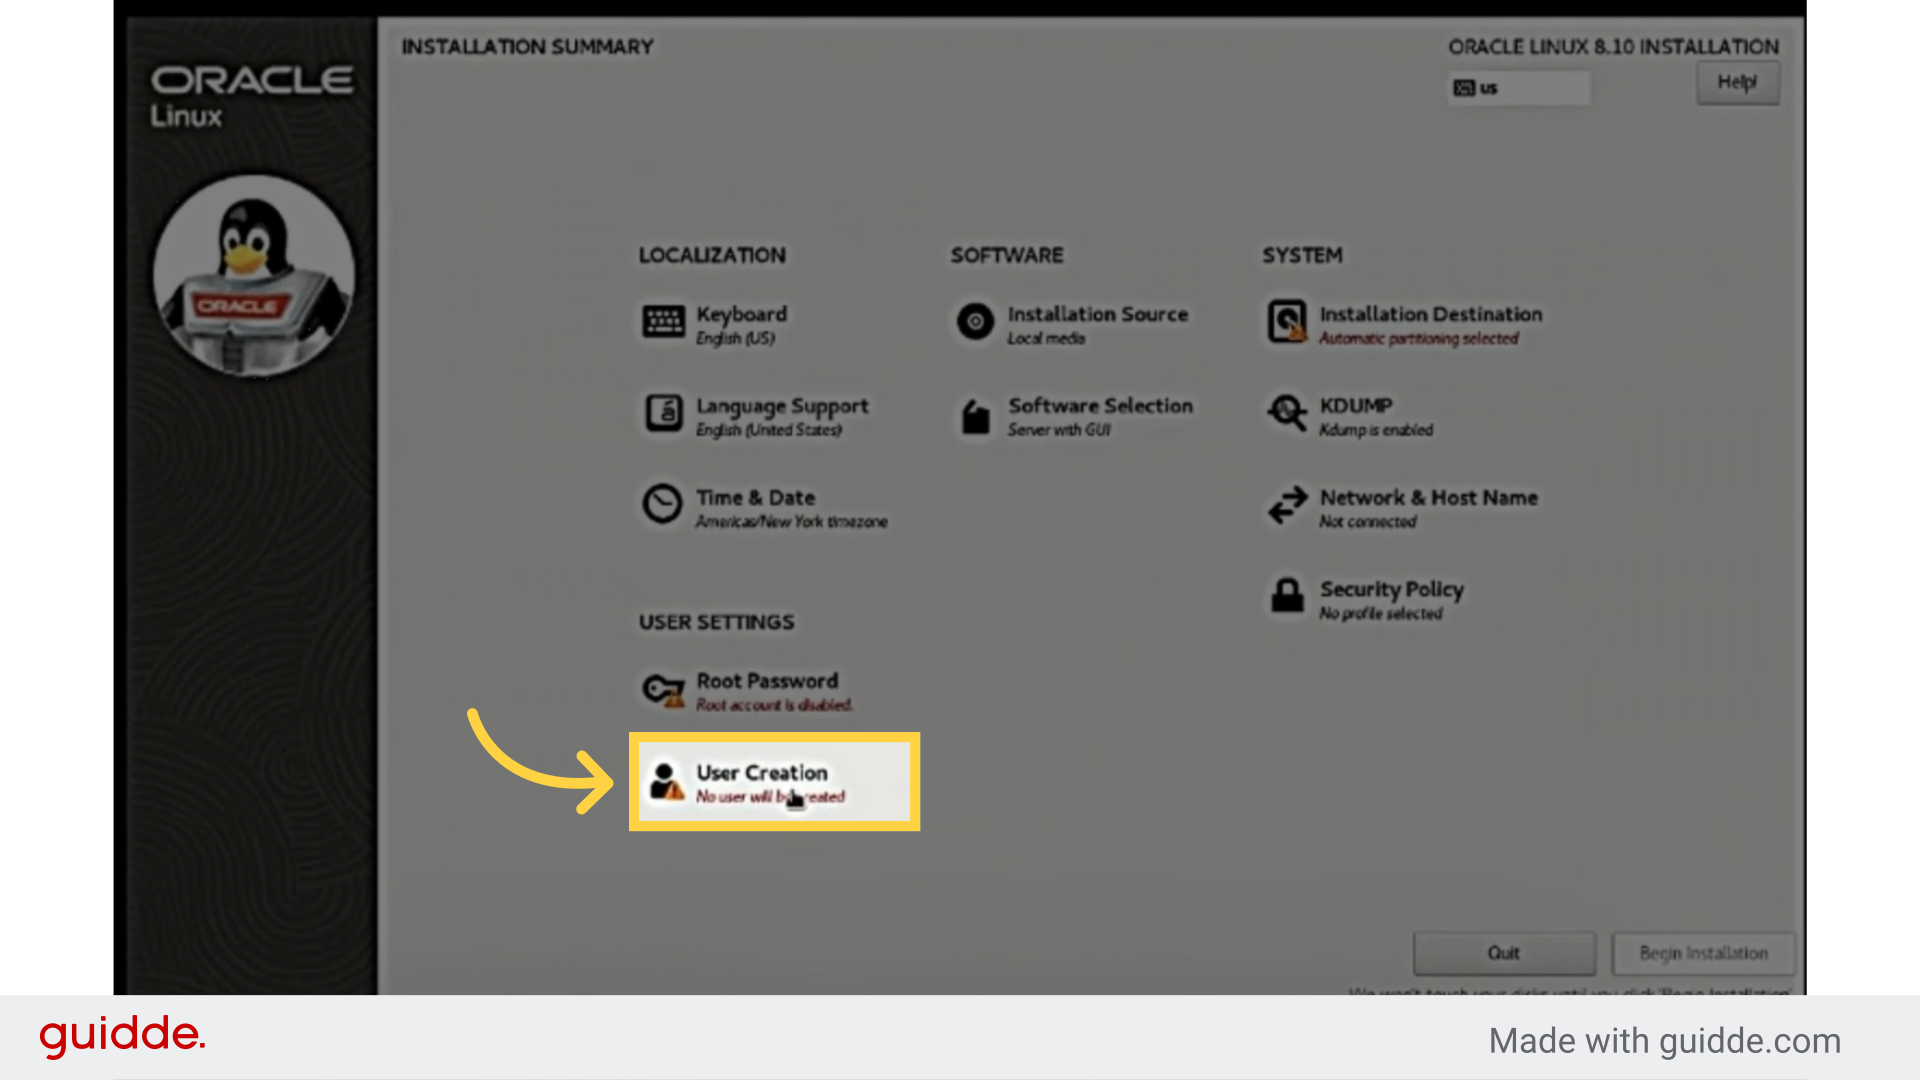
3. Select User Creation
Select the "Media Player" option.
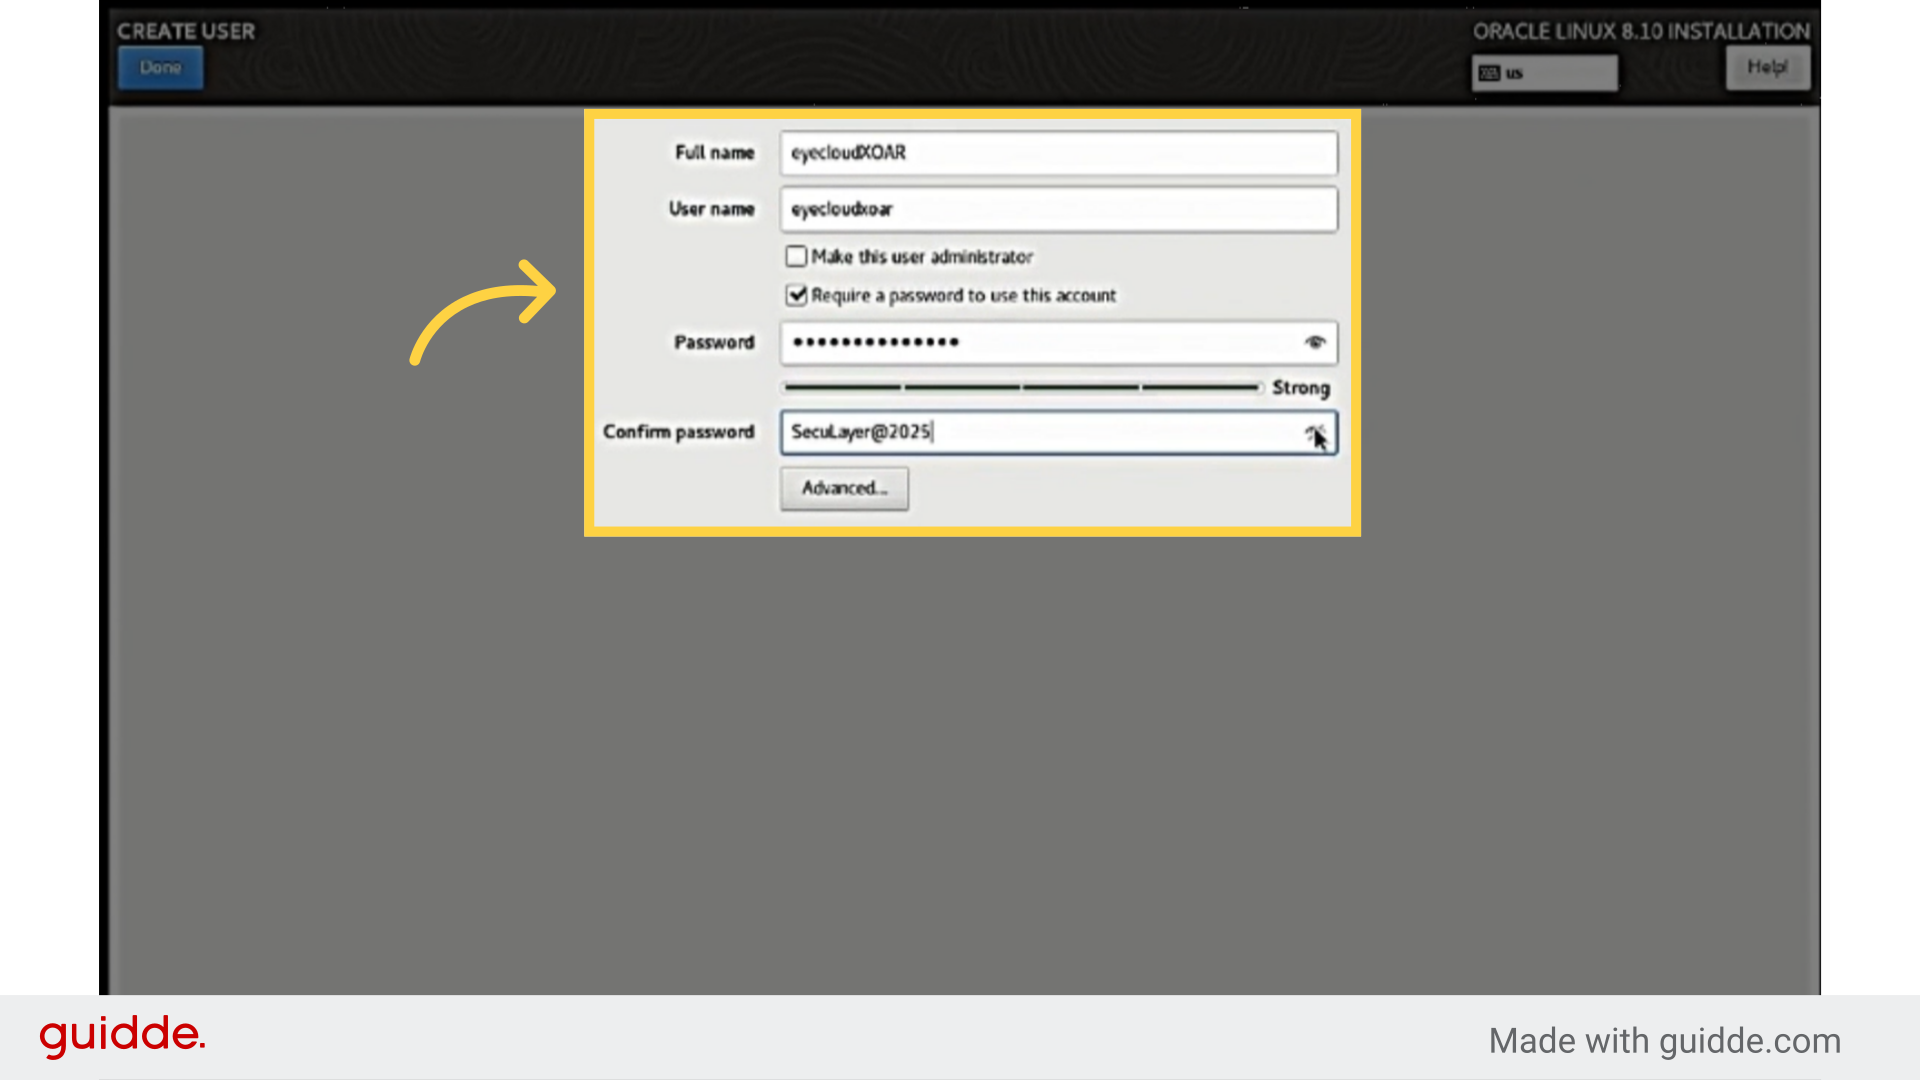
4. Creating a new user account
Administrator privileges during Oracle Linux installation.
ex : Full name : eyeCloudXOAR User name :
eyeCloudxoarPassword : SecuLayer@2025After insert click Done
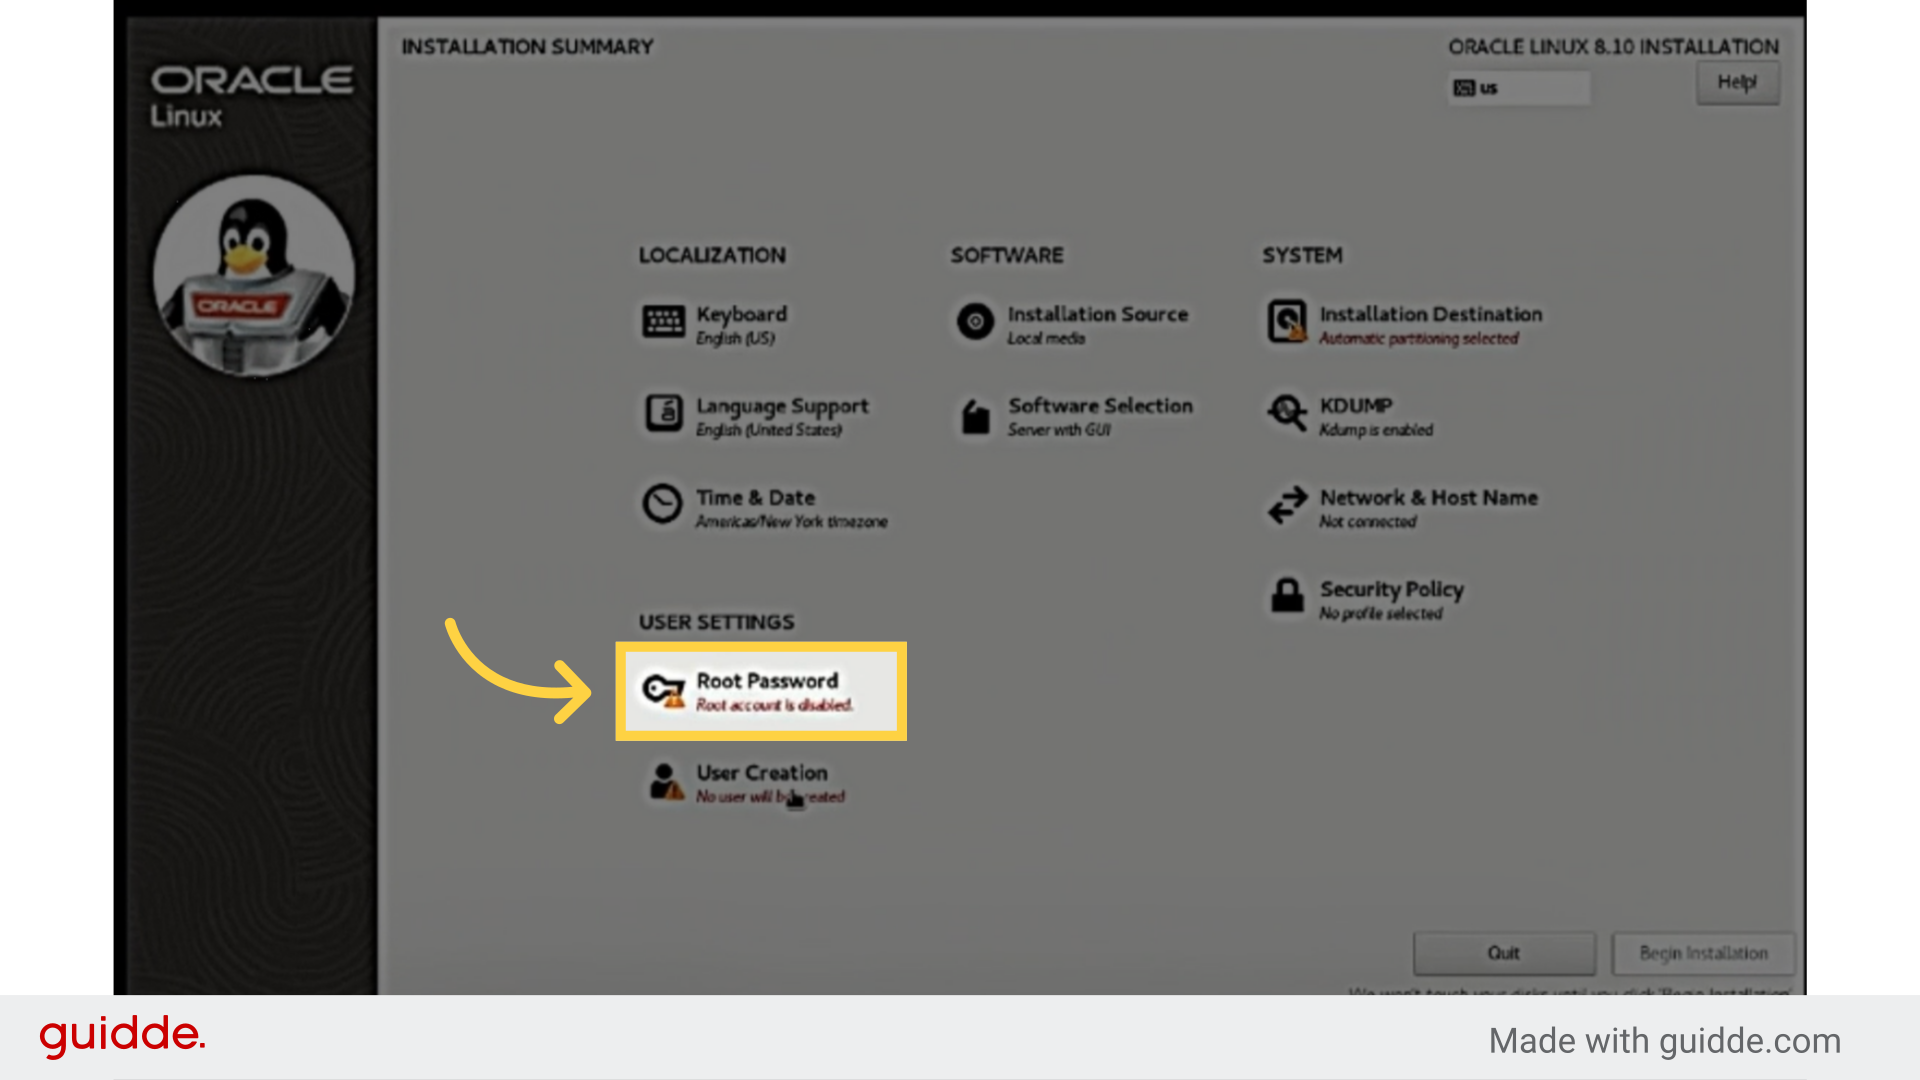
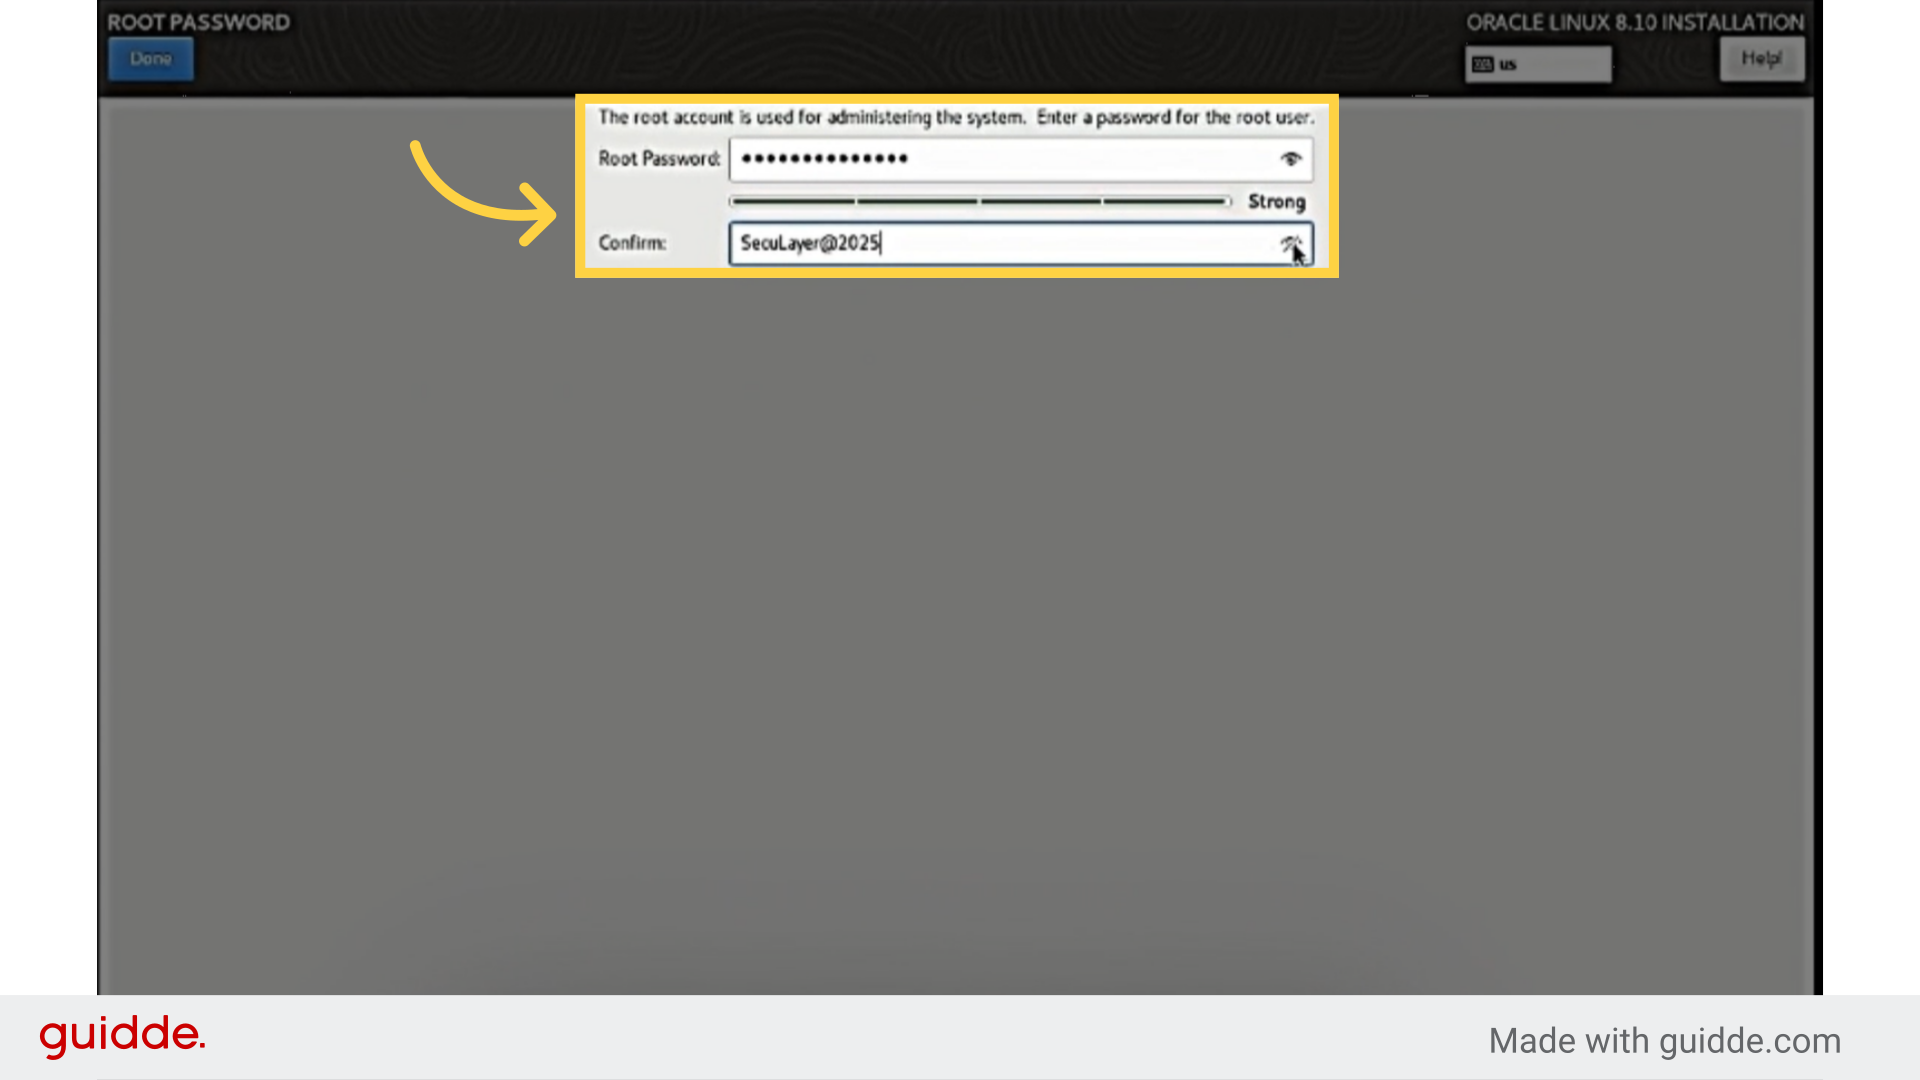
5. Click "Root Passward "
6. Root accaunt is used for administering the system. Enter a password for the root user ex) SecuLayer@2025
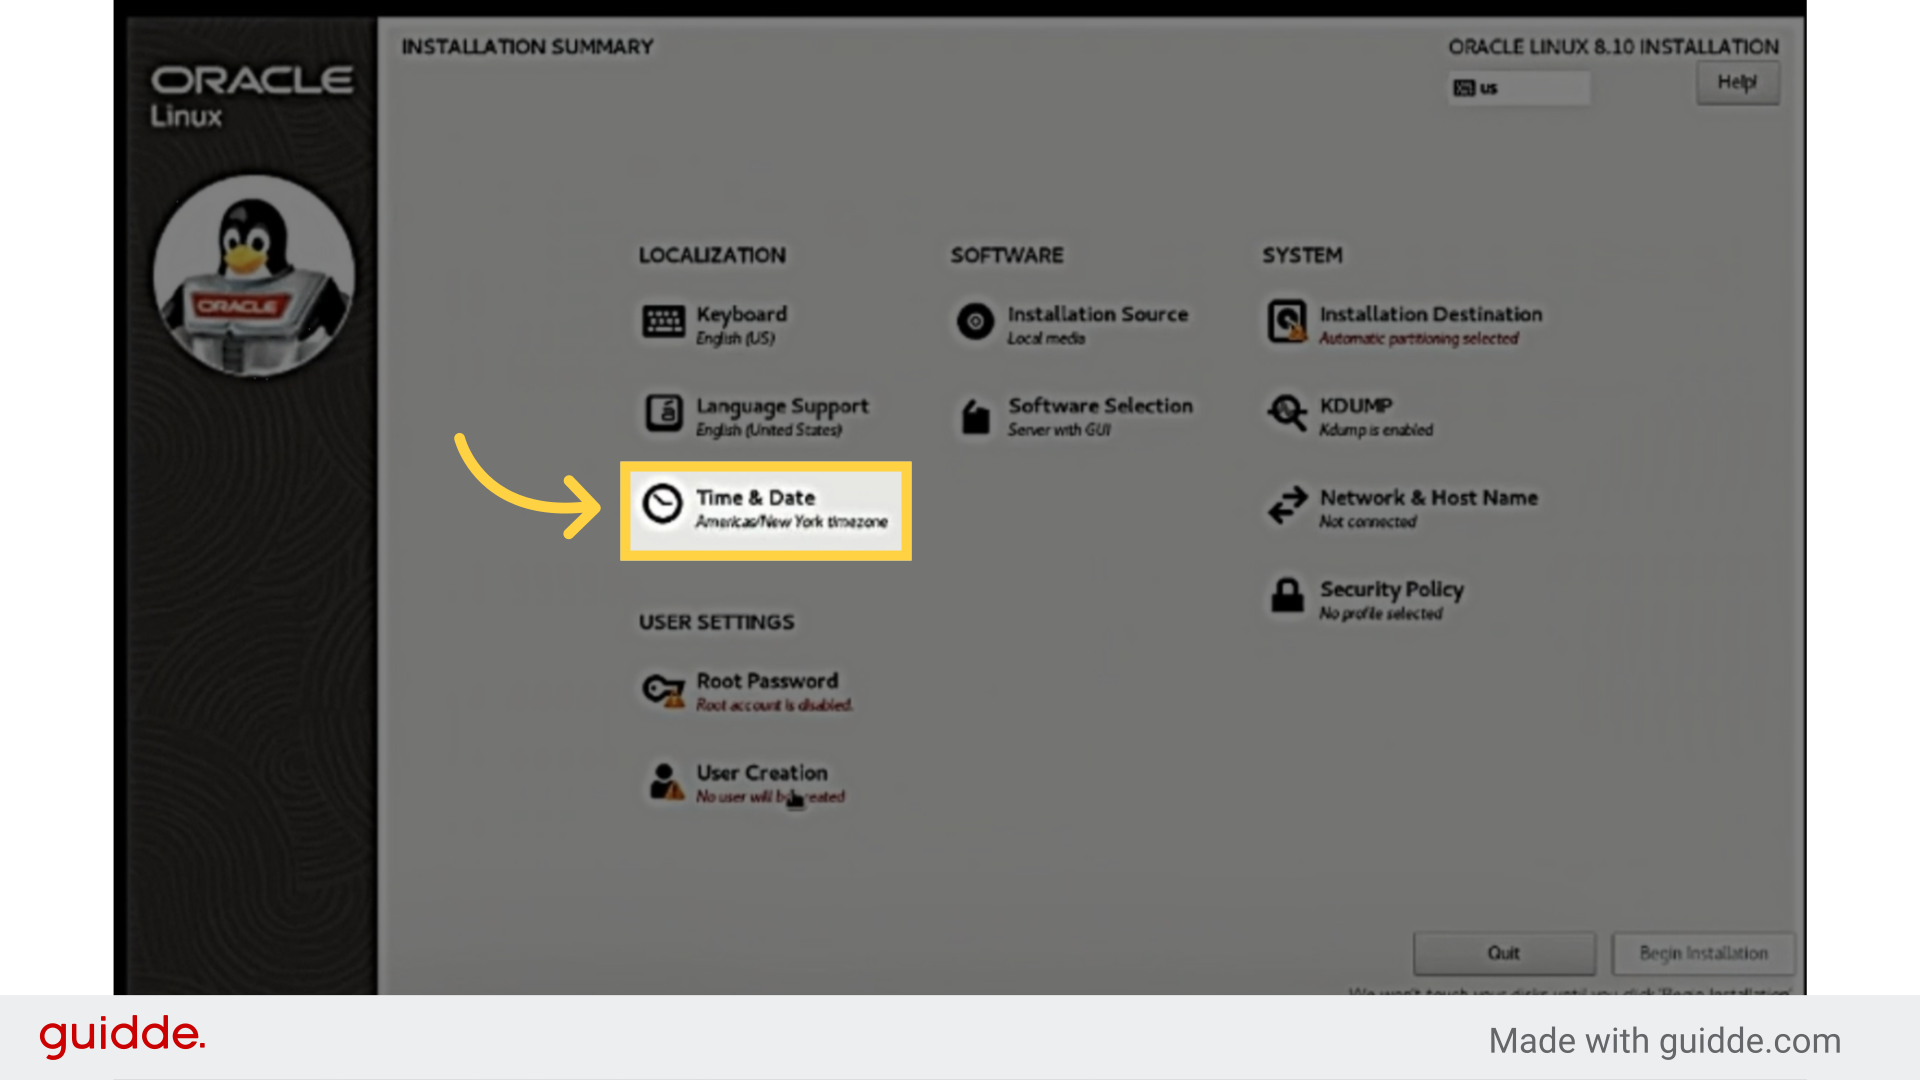
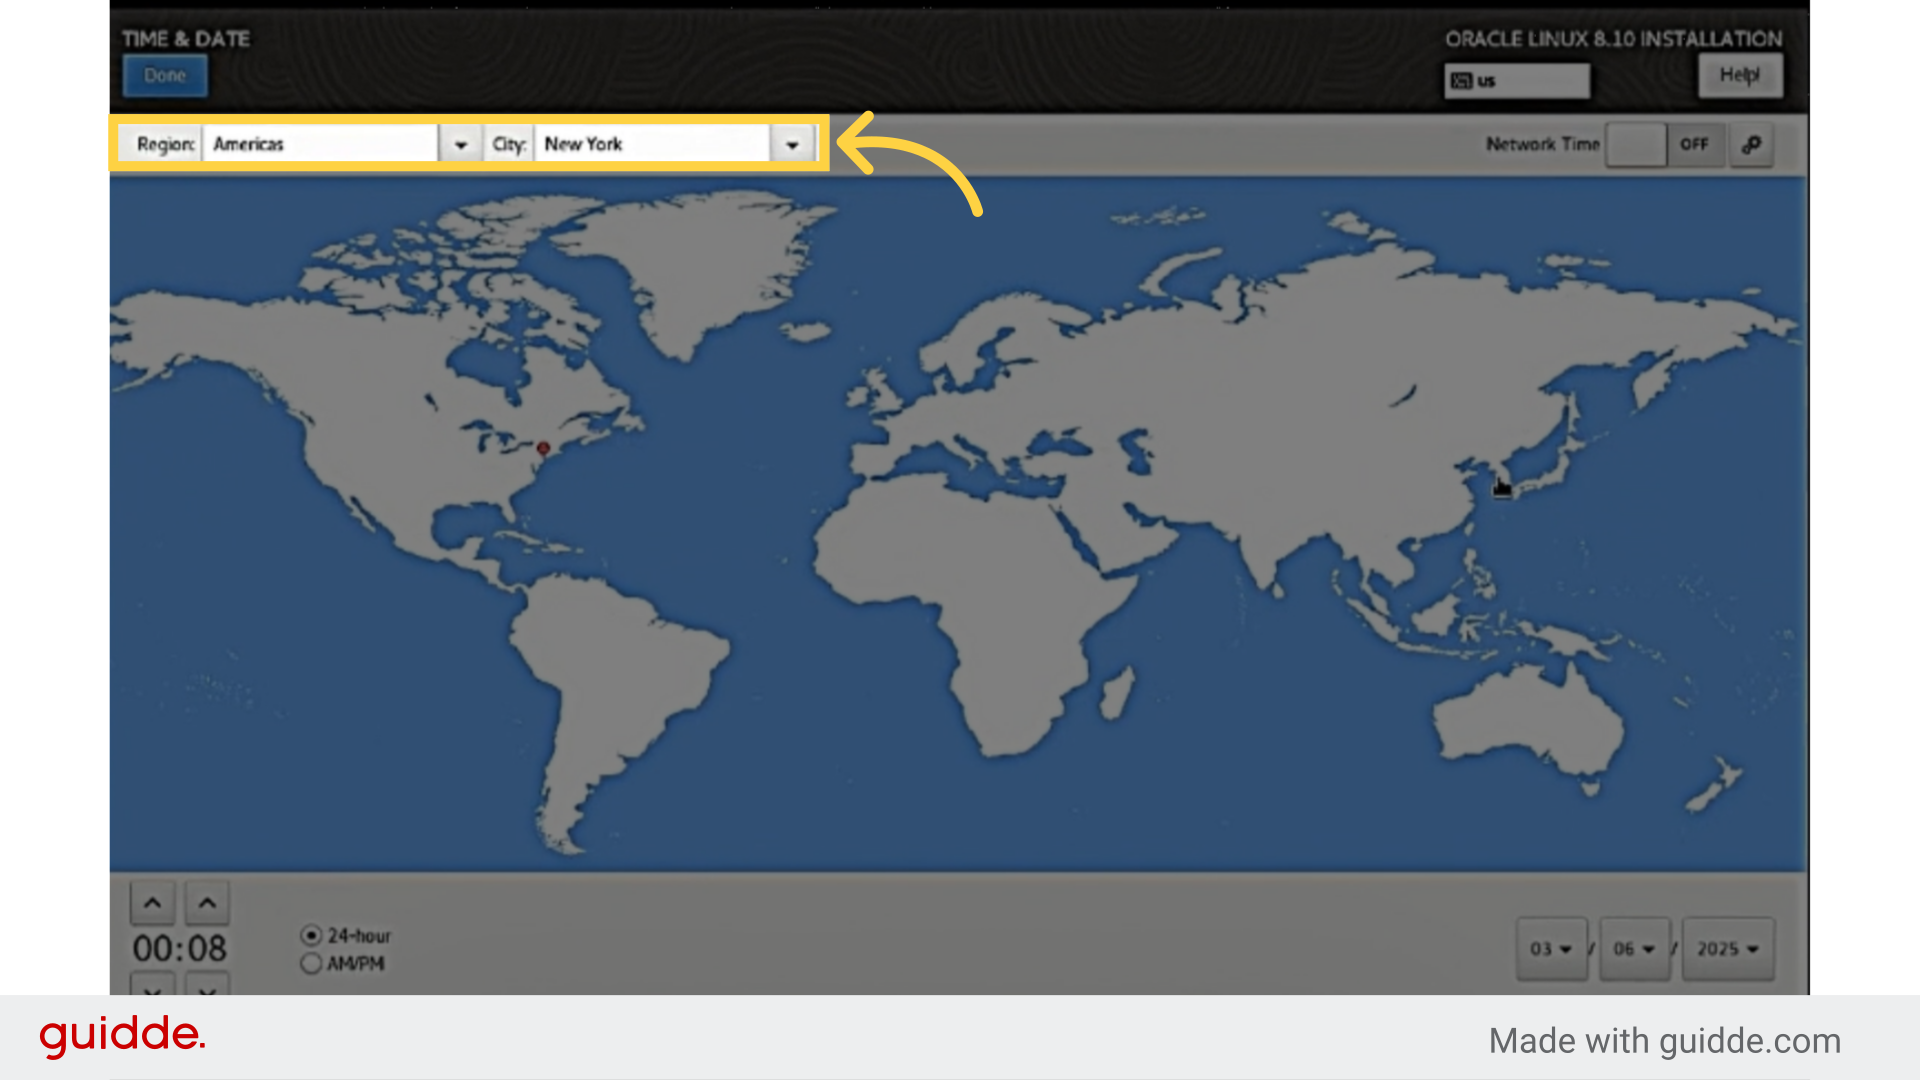
7. Select Time & Date
8. Configure settings based on partition location. Click done
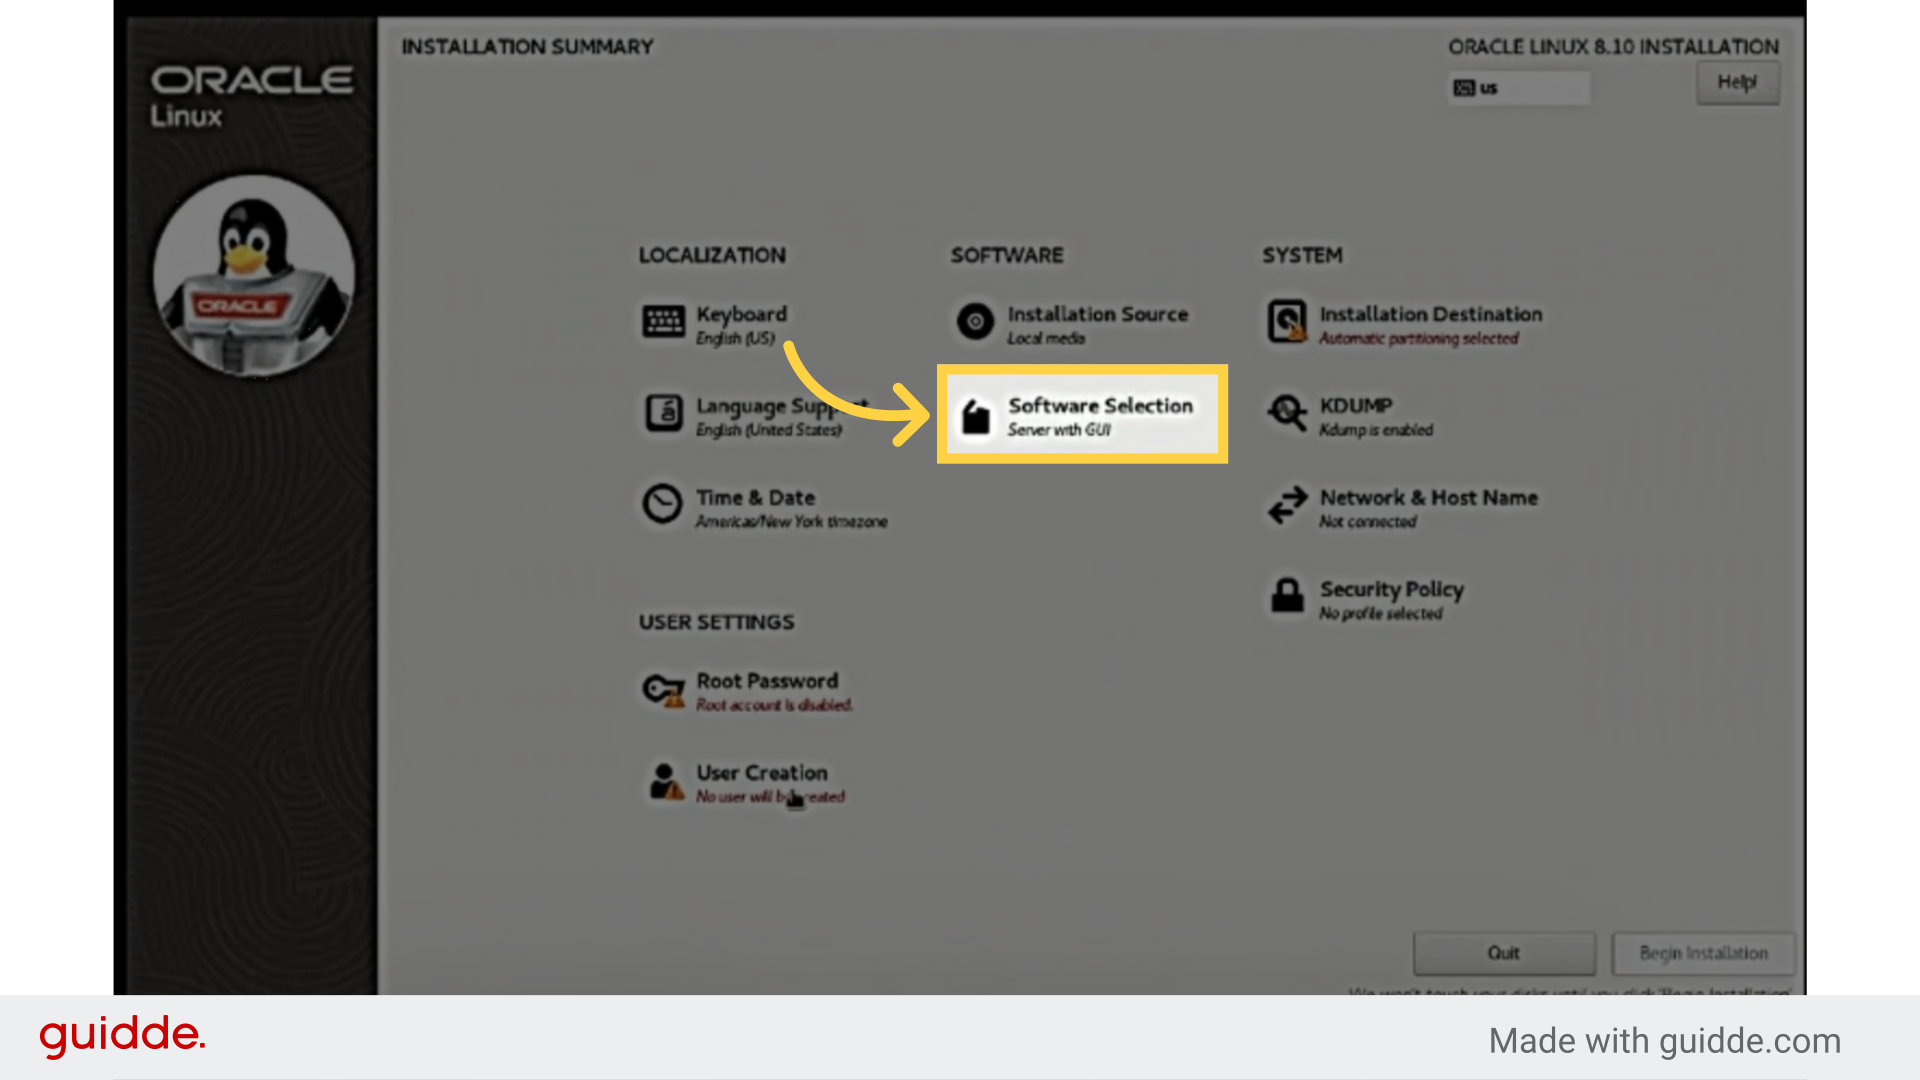
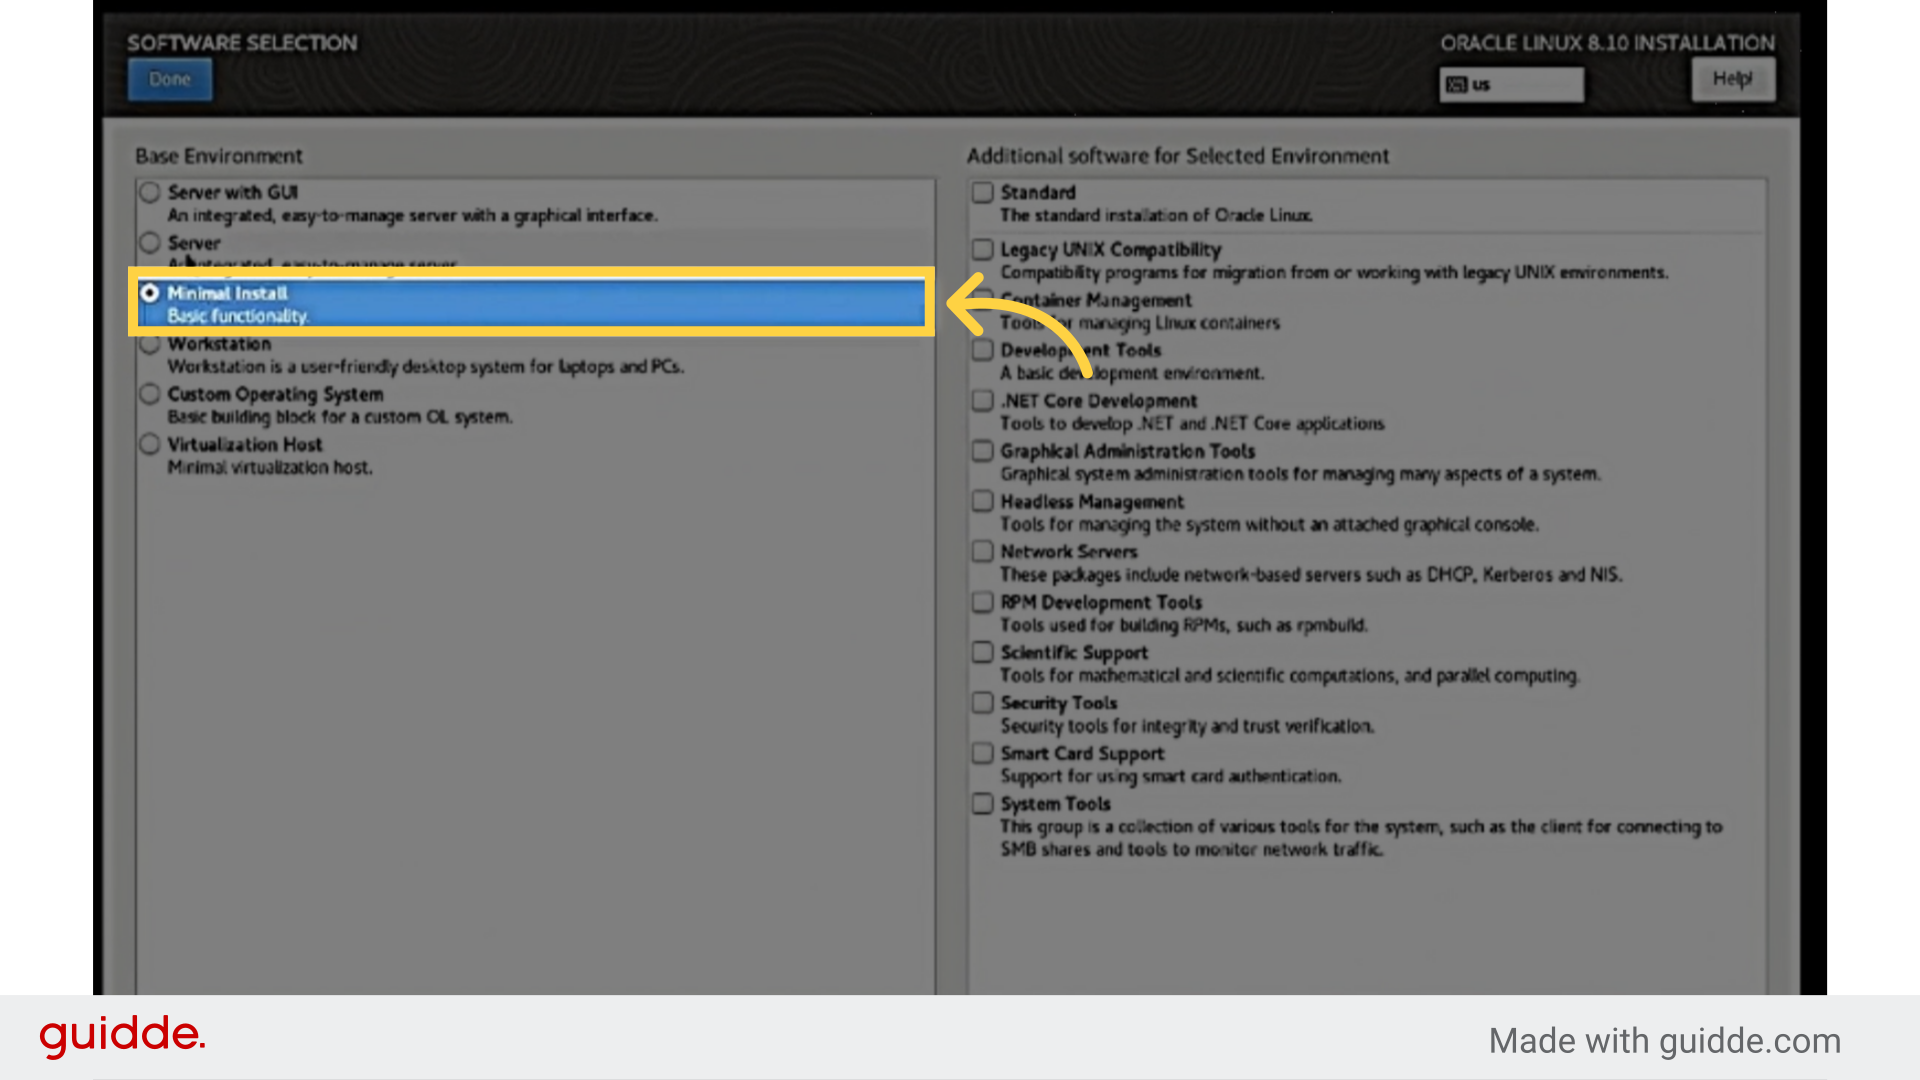
9. Select Softwere Selection and choose Minimal install
Select the "Media Player" option.
10. Select Minimal Install and Done
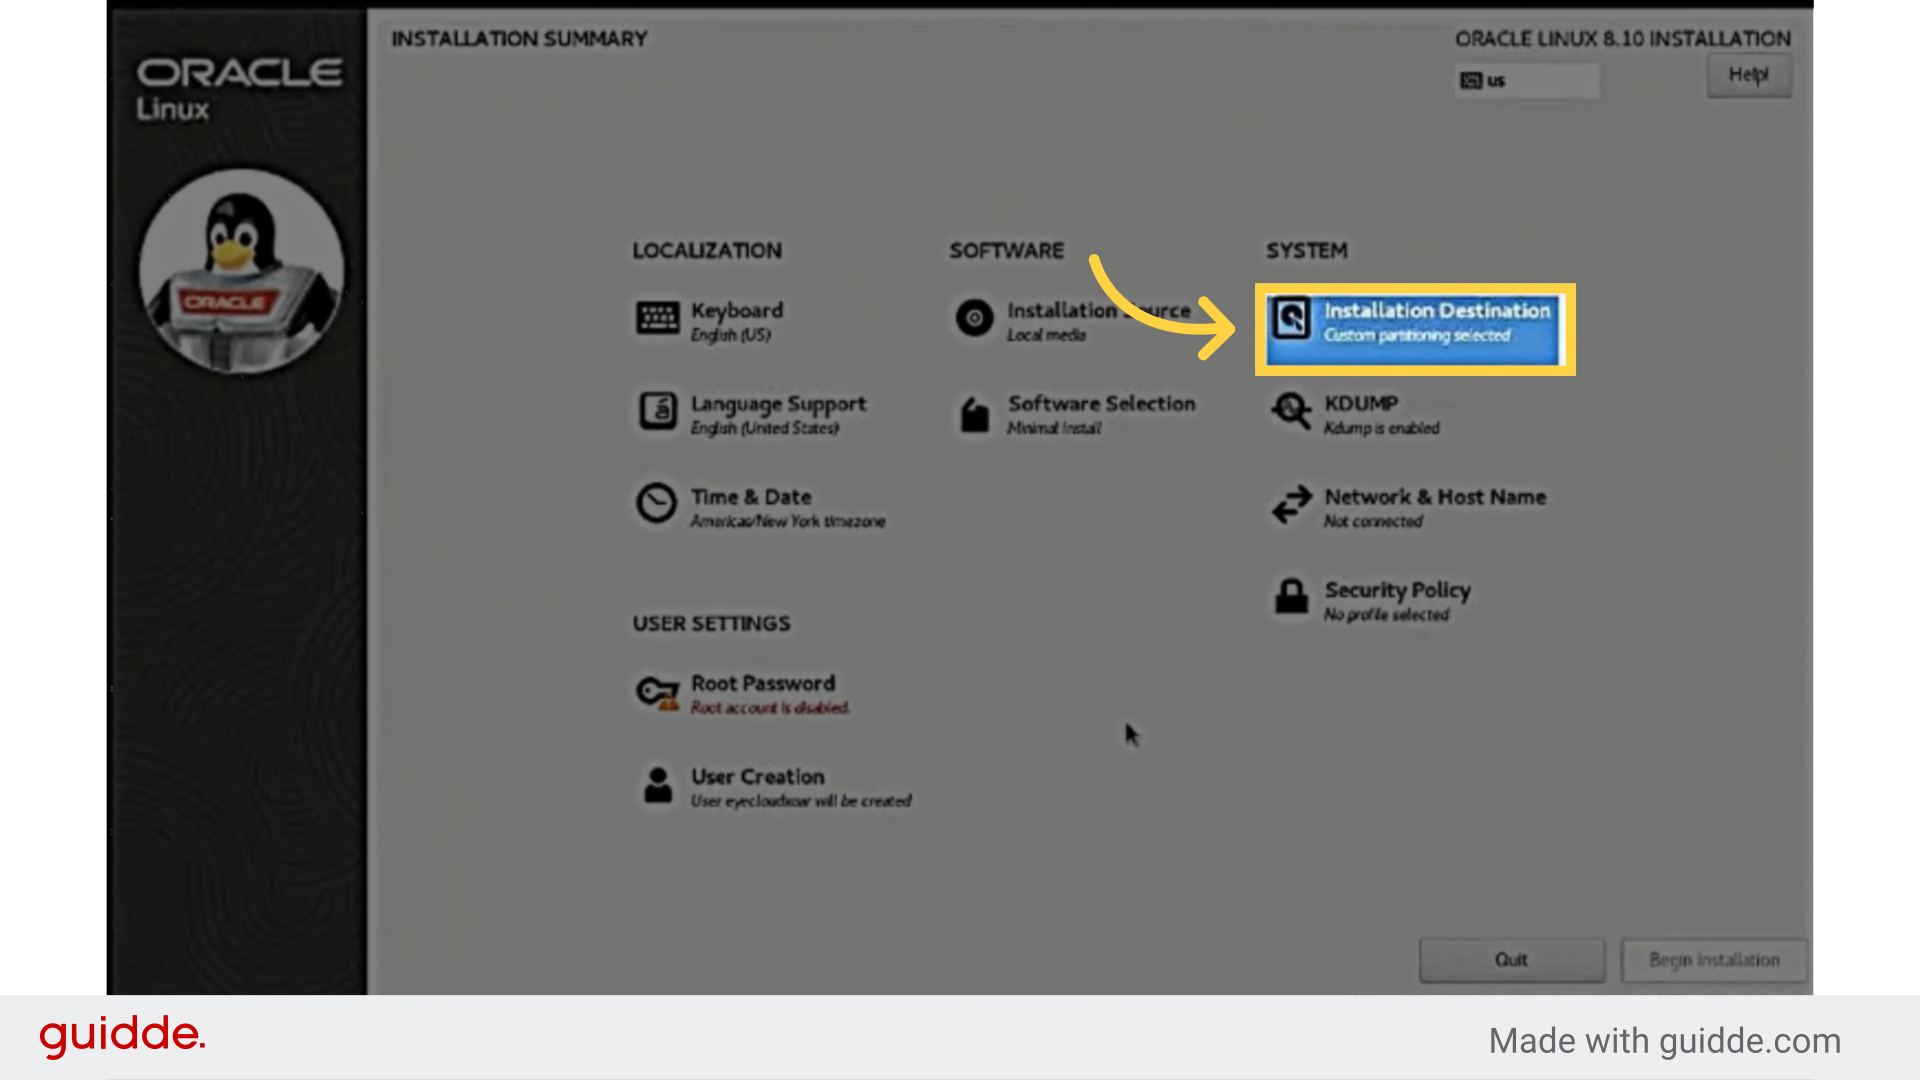
11. Select 'INSTALLATION DESTINATION'
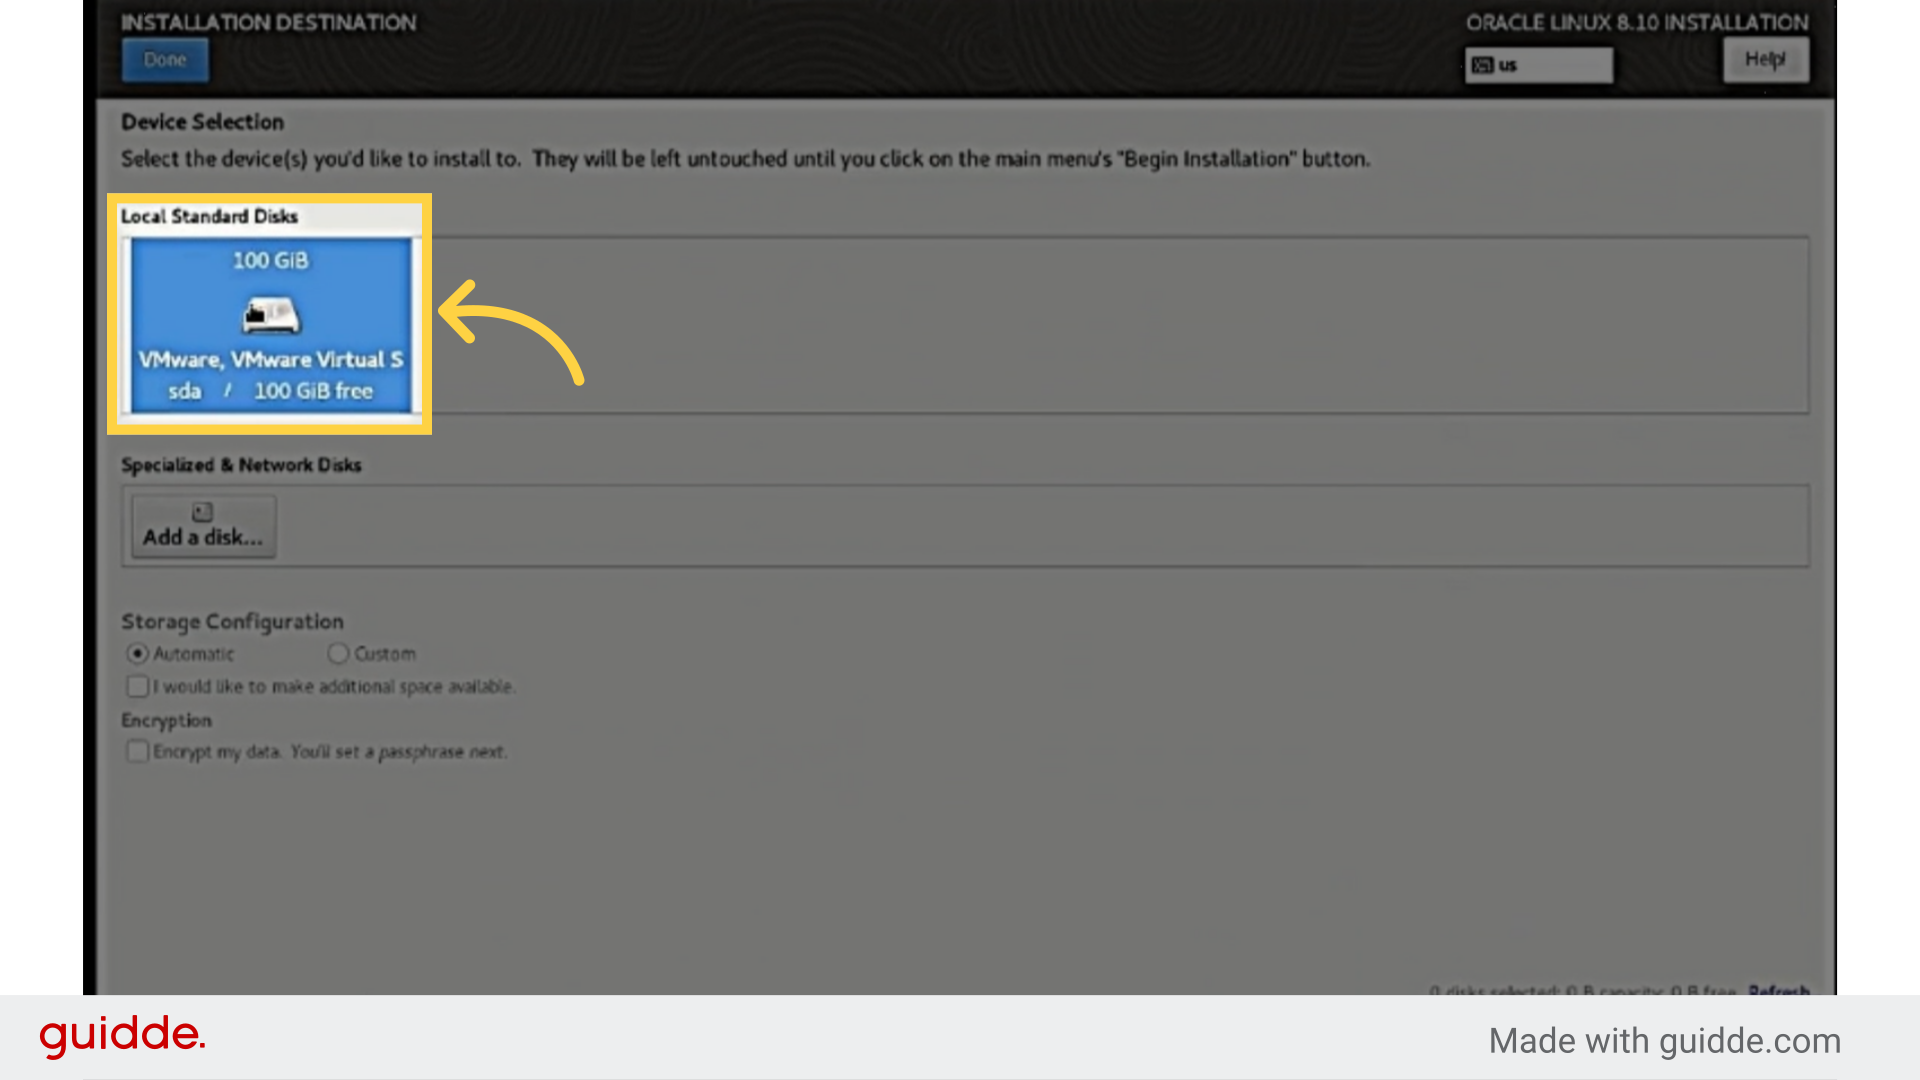
12. Select Local Standart Disks
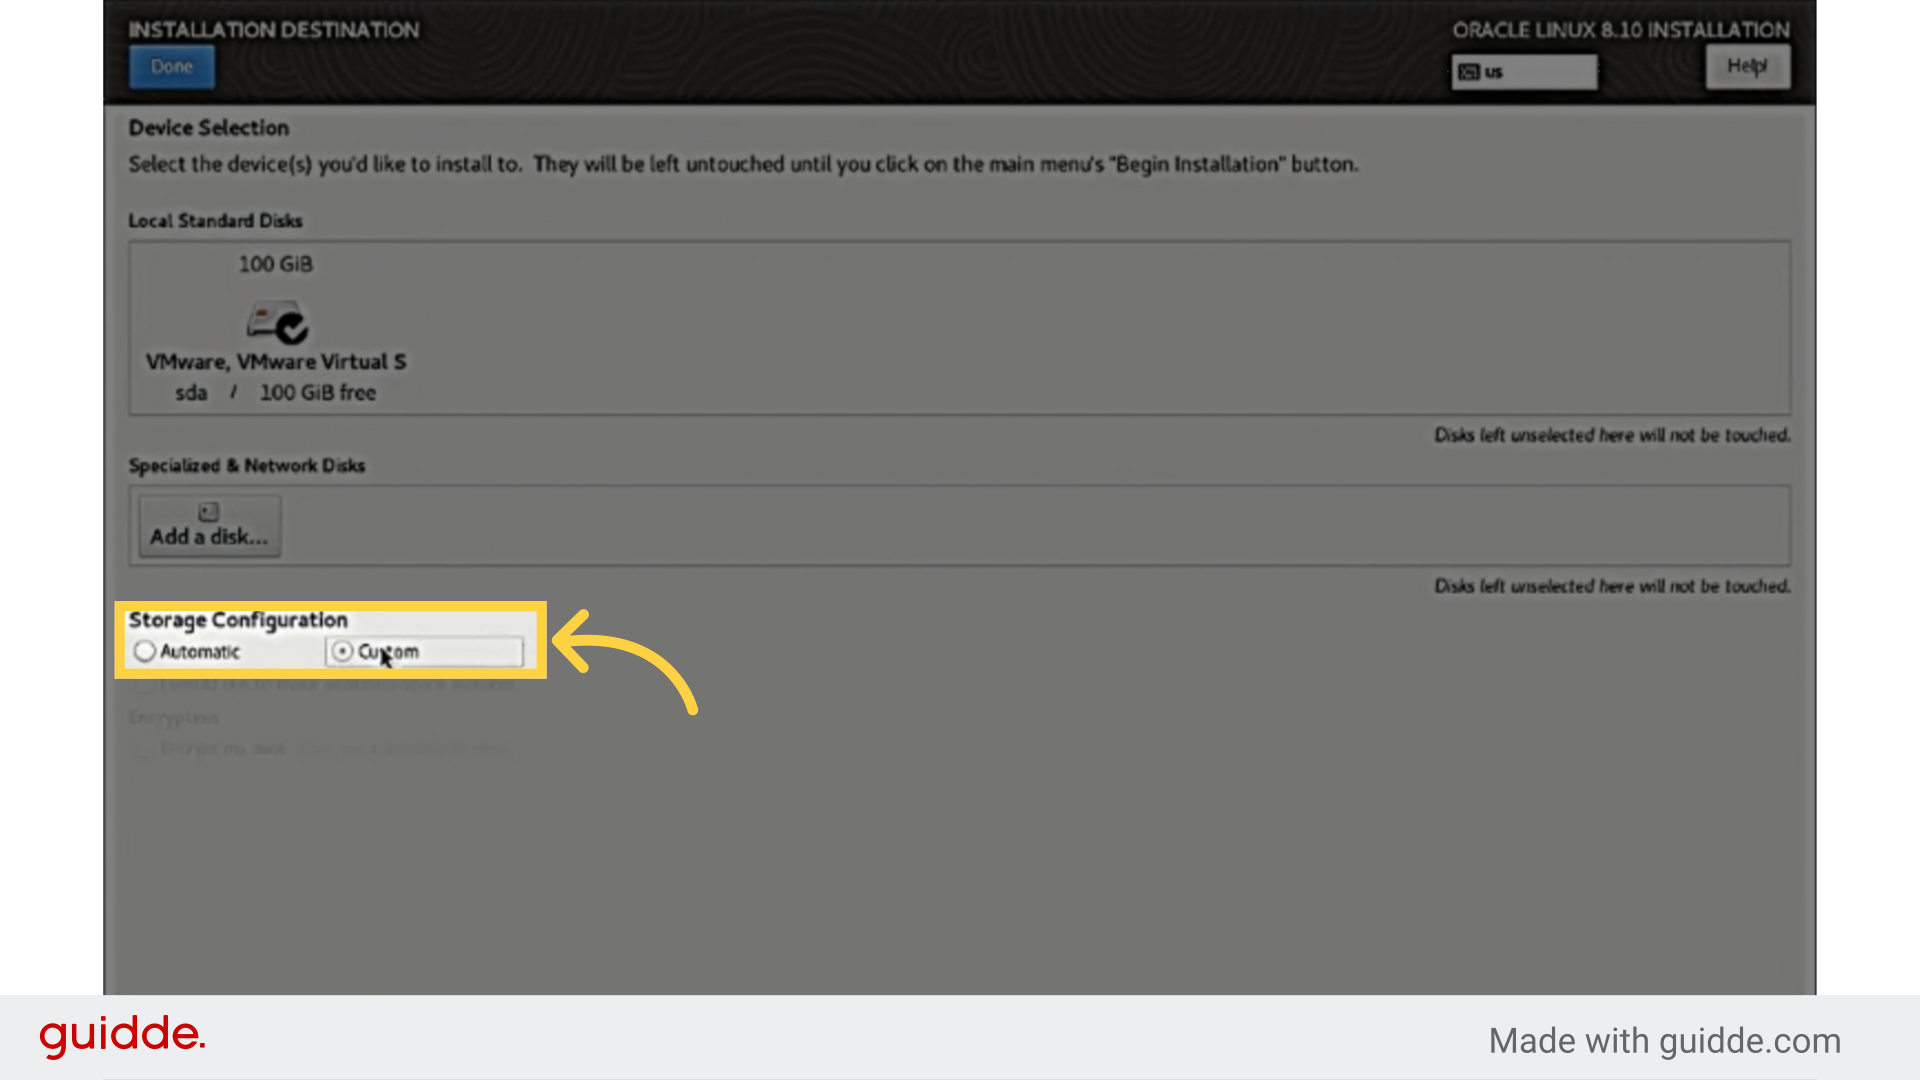
13. Under 'Storage Configuration,' choose 'Custom' and click Done.
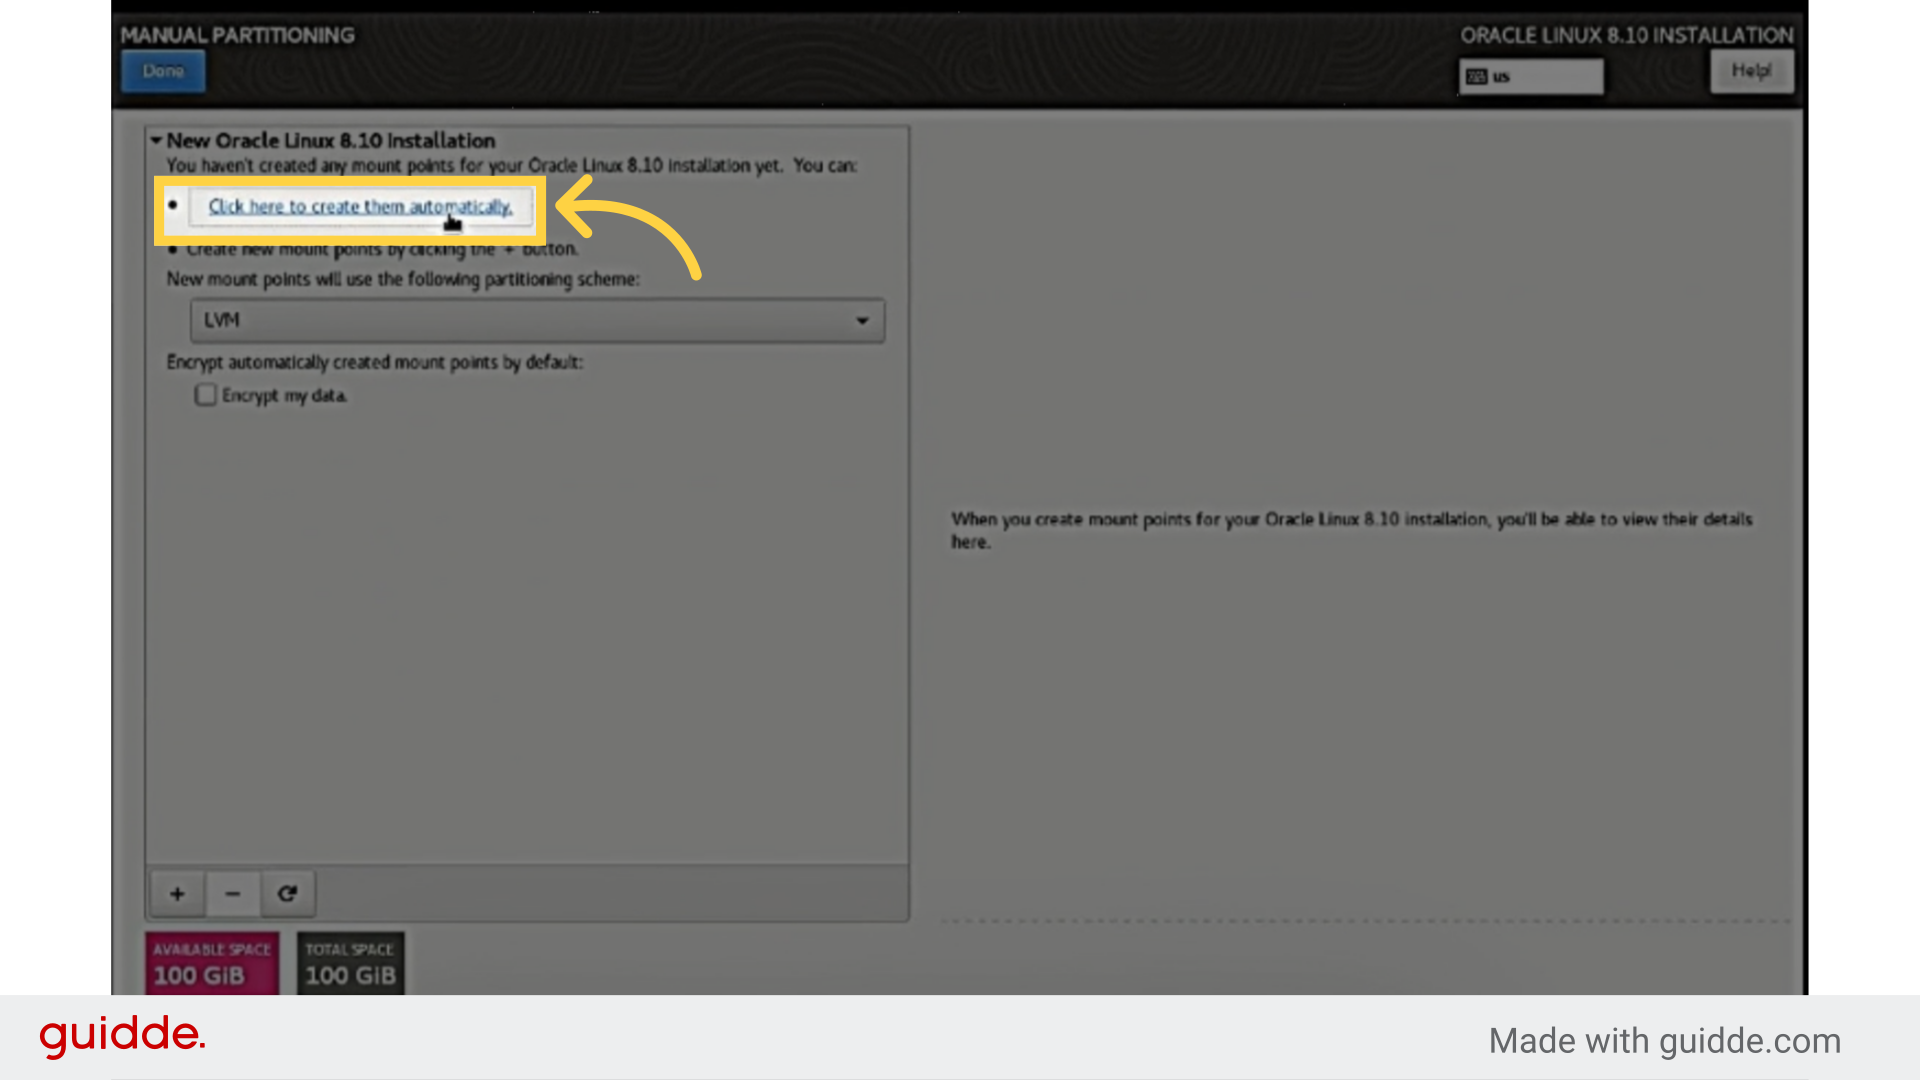
14. Click 'Click here to create them automatically
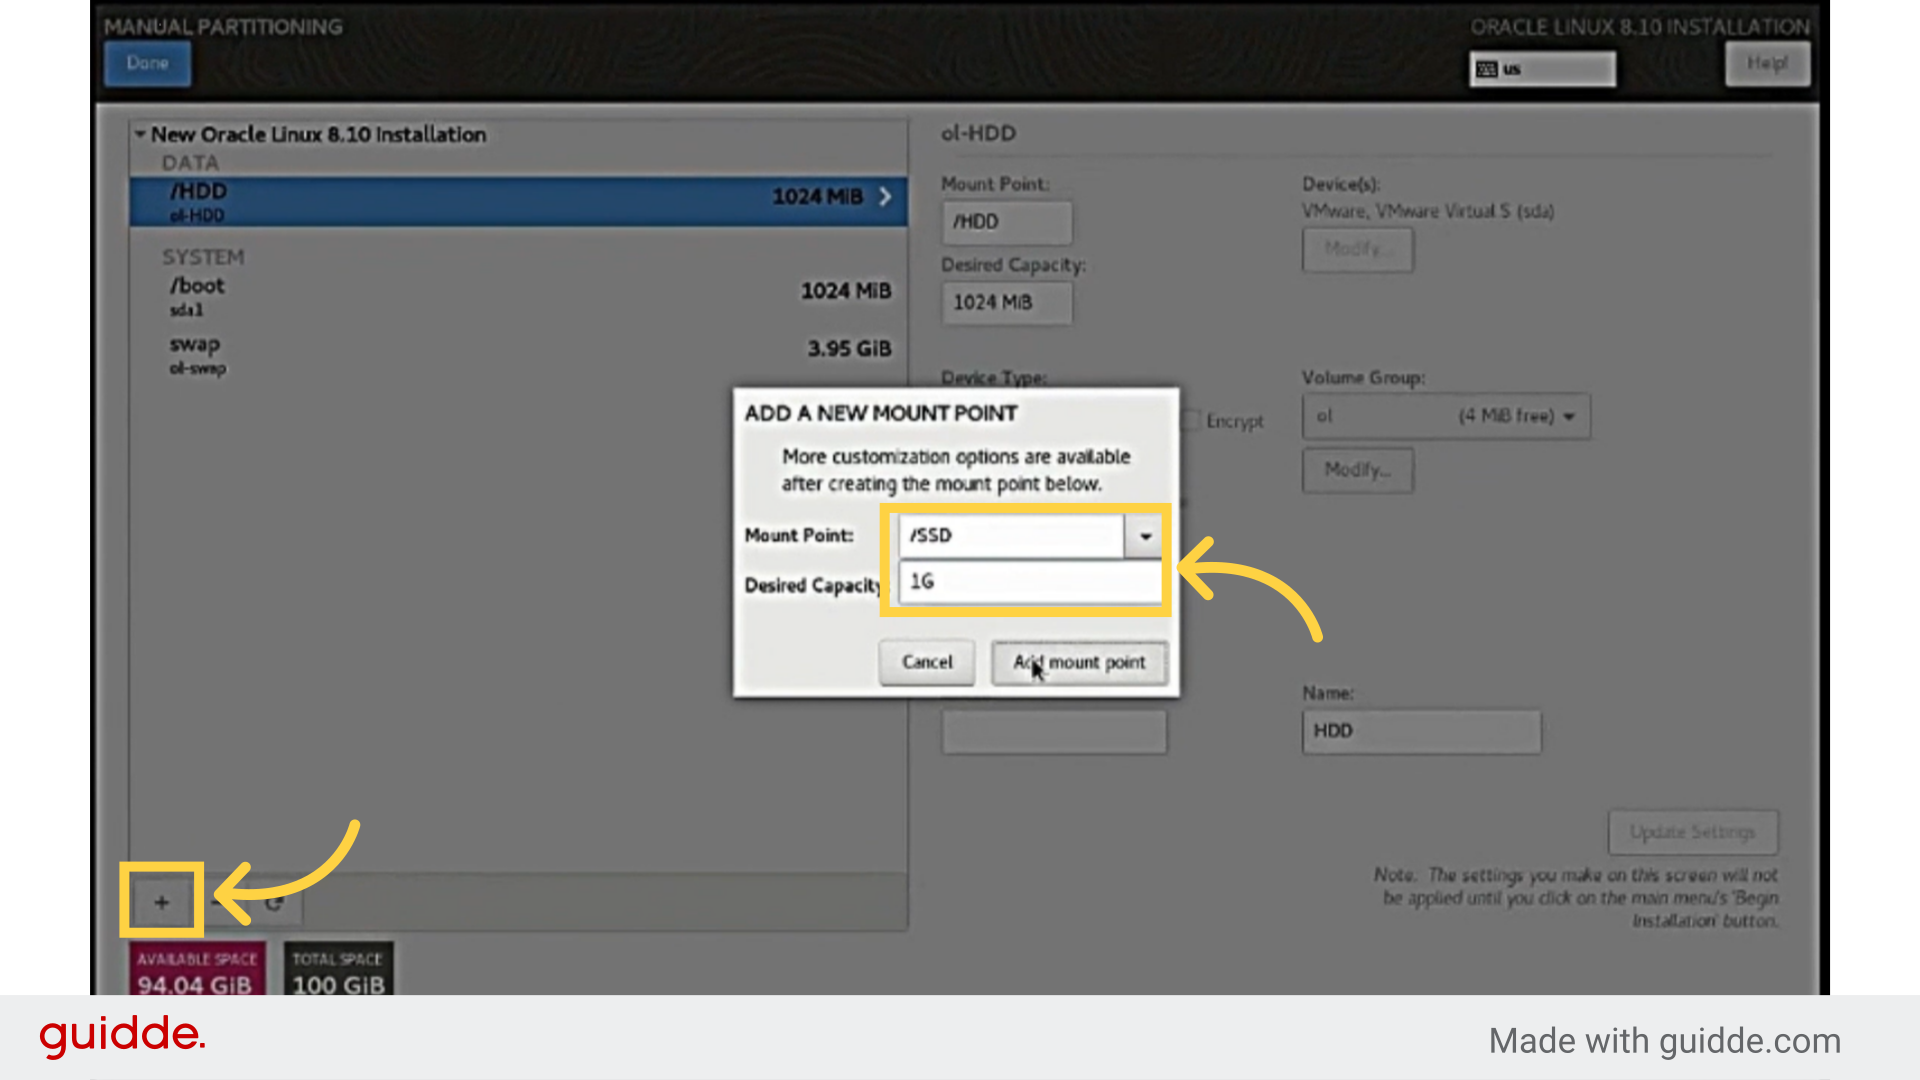
15. Click '+' to add a new partition. Set mount point and size, then click 'Add mount point' Click '+' to add a new partition. Set mount point to /SSD, /HDD, or /PROCESS if the partition exists.
Choose the "Cancel" option.
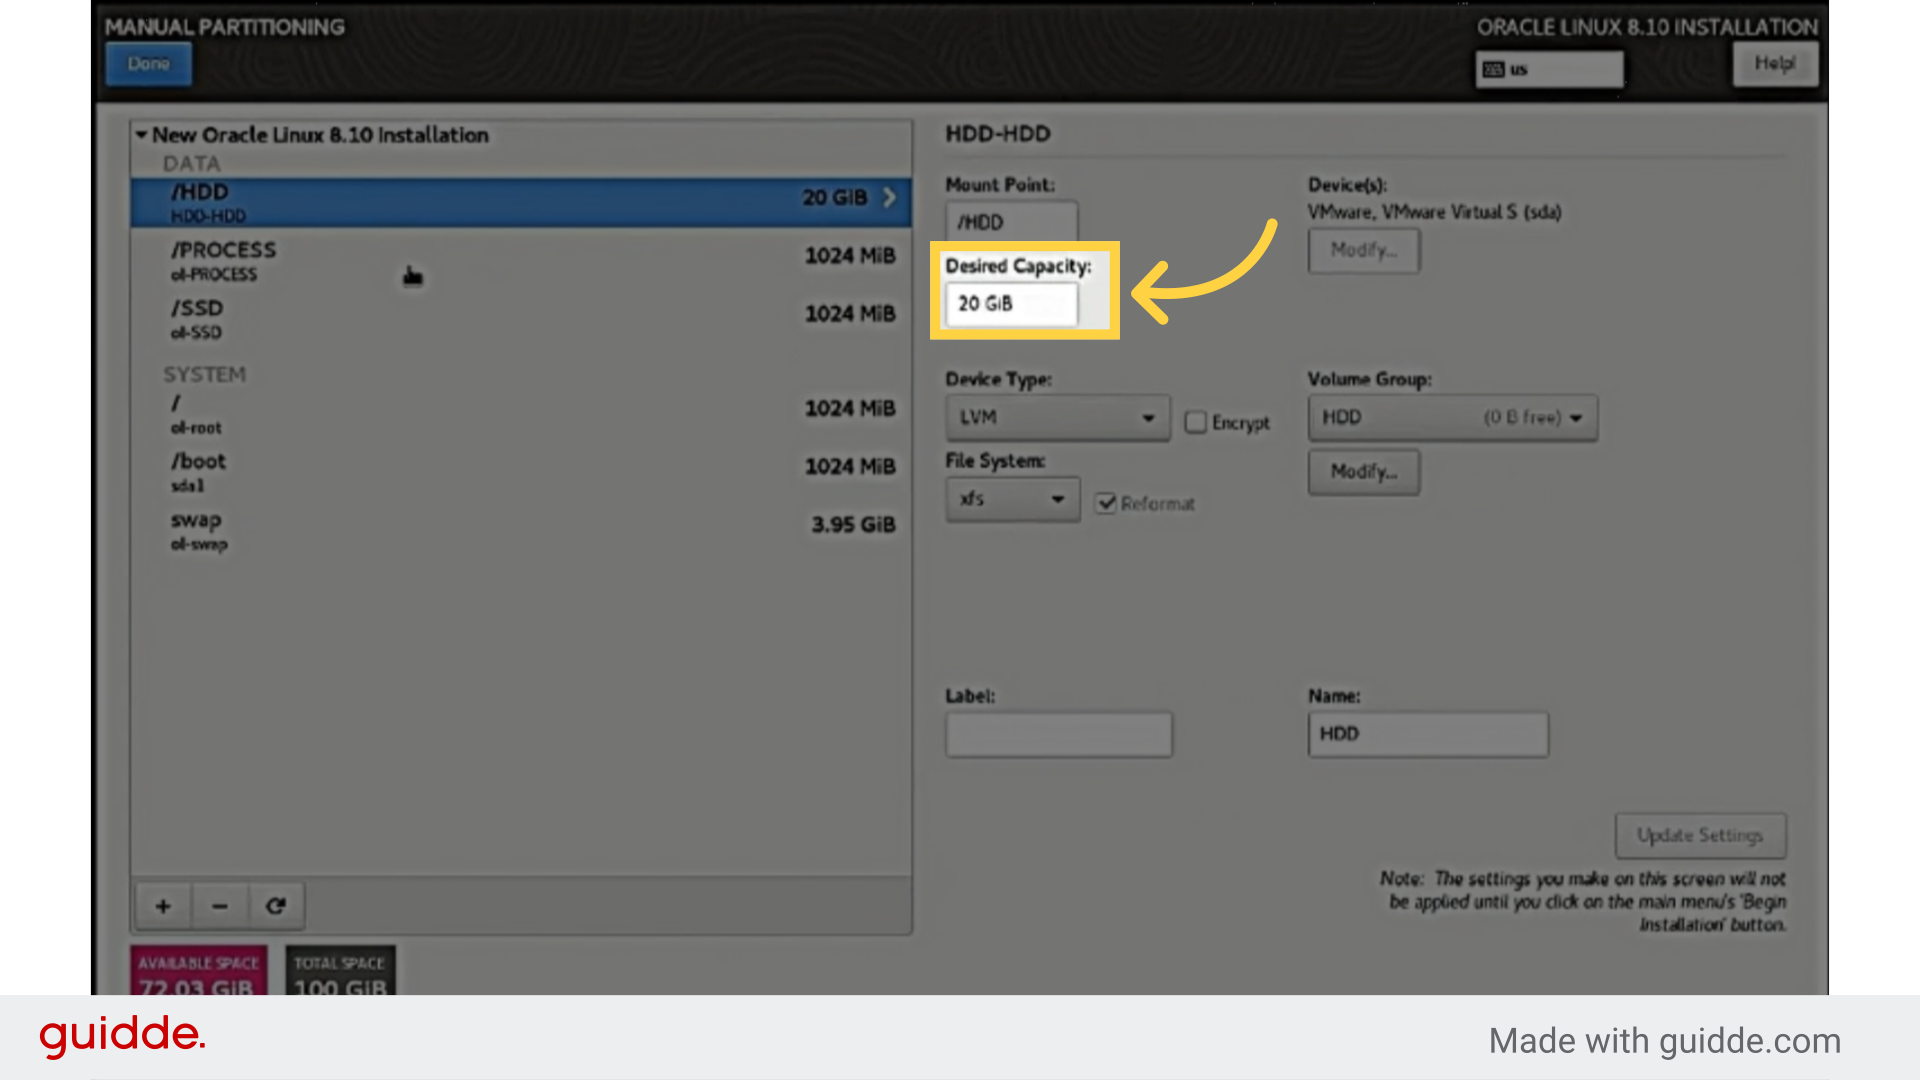
16. Select each partition one by one. Set size: HDD 20 GiB, SSD 20 GiB, PROCESS 25 GiB.
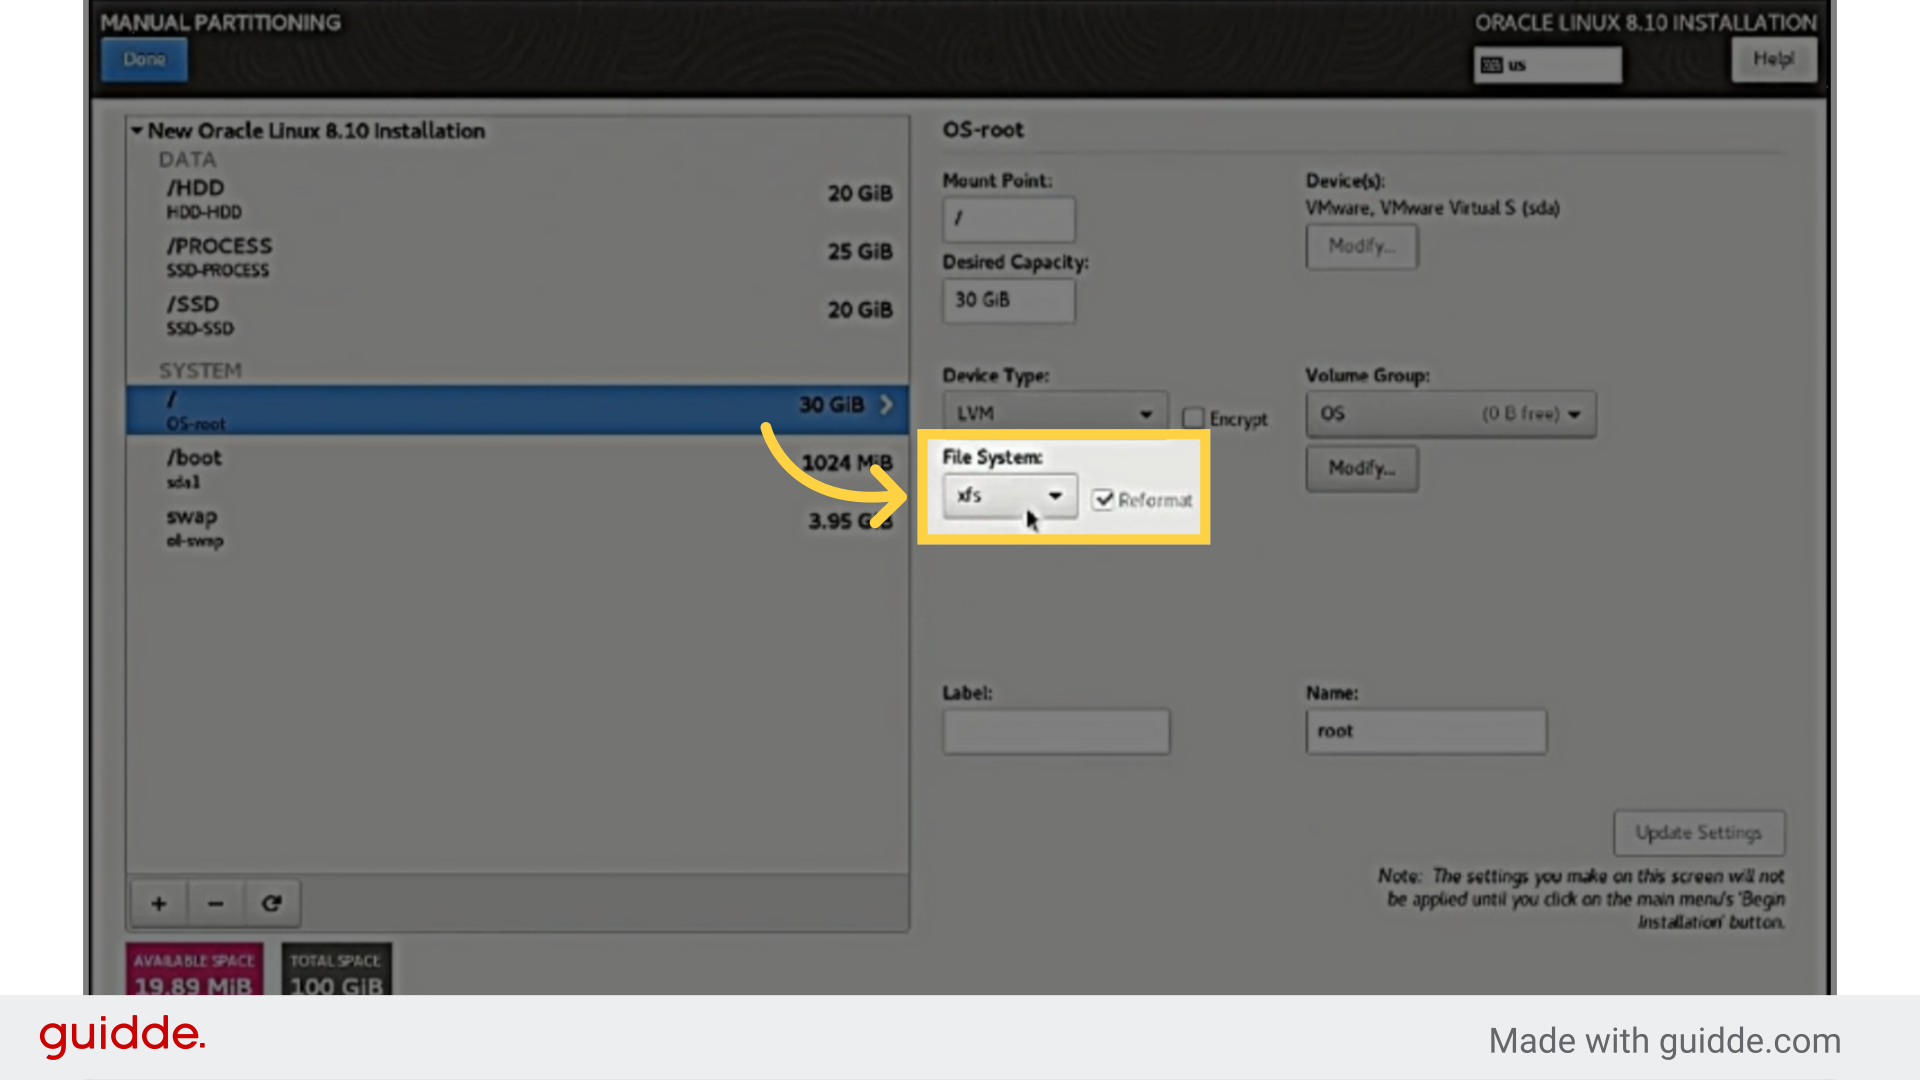
17. Click on /root file system. Change the file system to ext4.
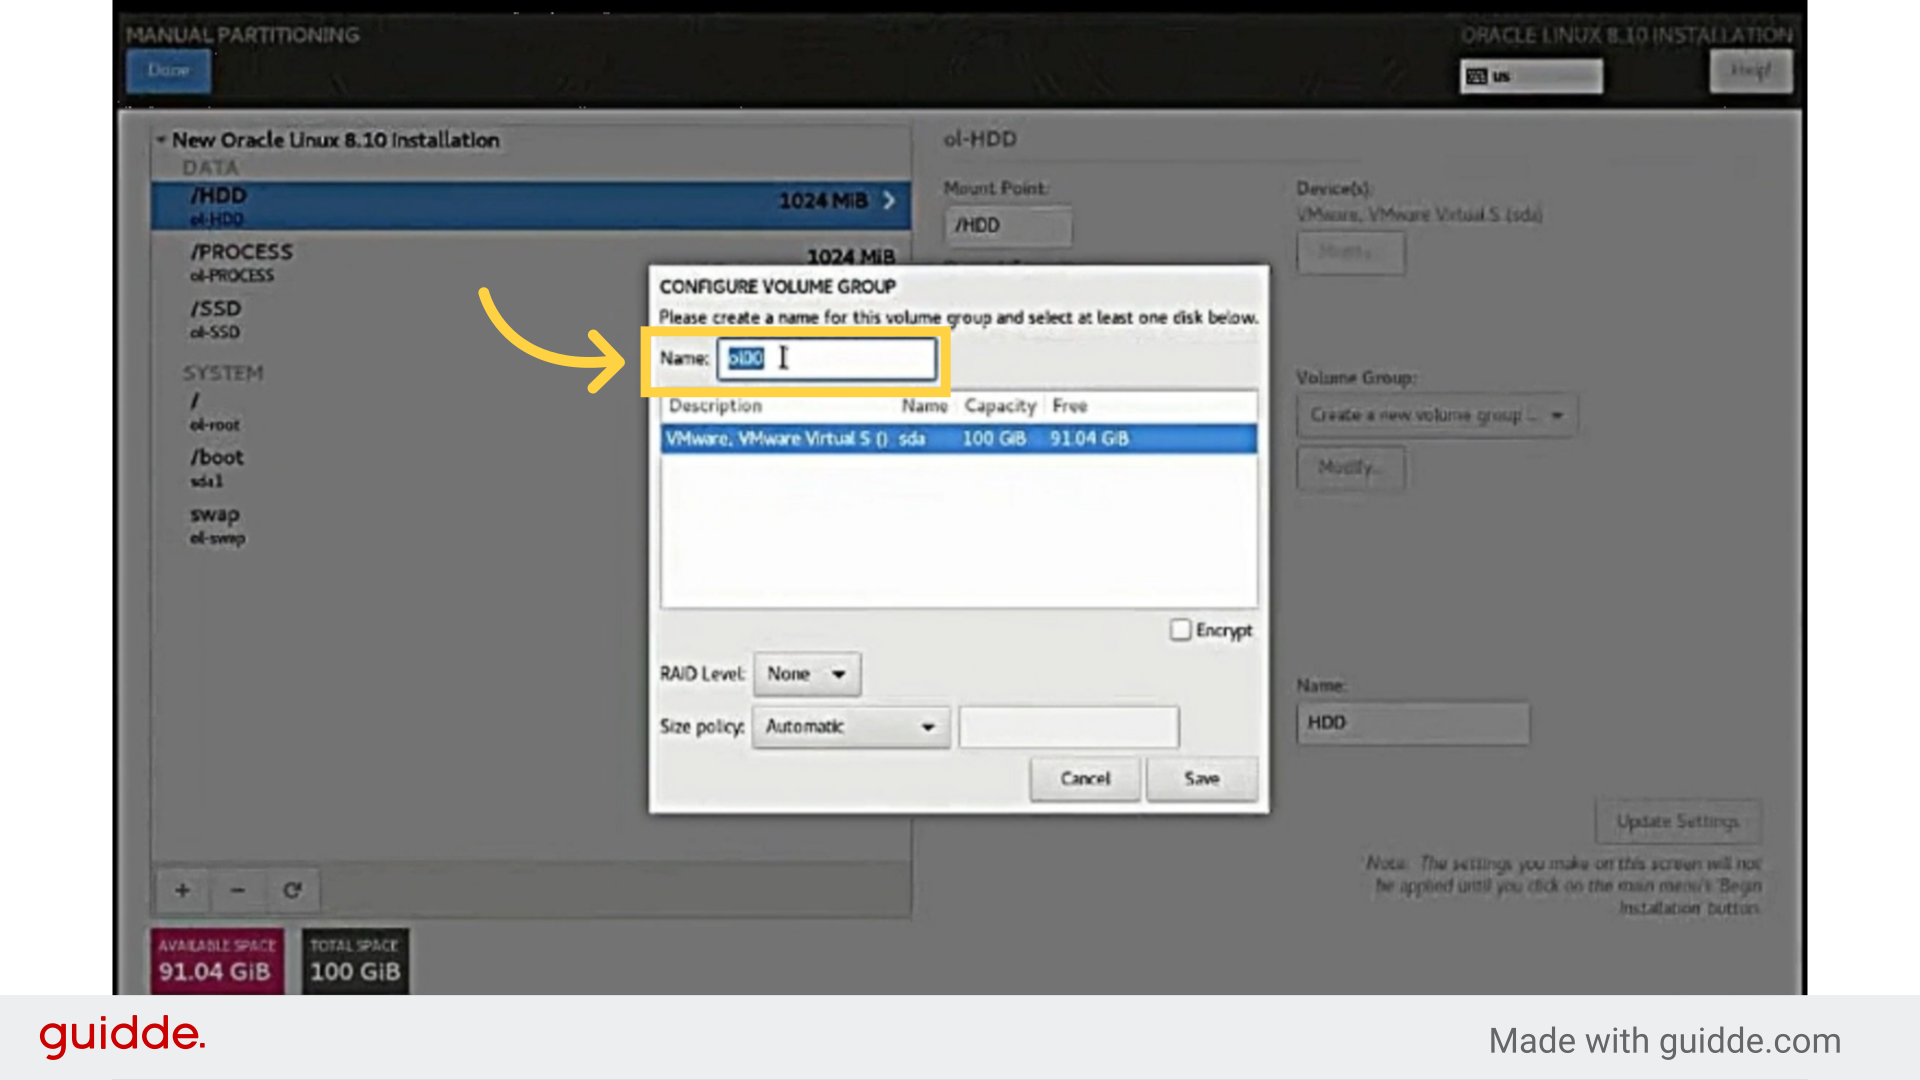
18. Go to ‘Volume Group’. Assign HDD, SSD, and PROCESS to matching groups Assign volume group: HDD → HDD, SSD → SSD, PROCESS → SSD. Set /root volume group as OS
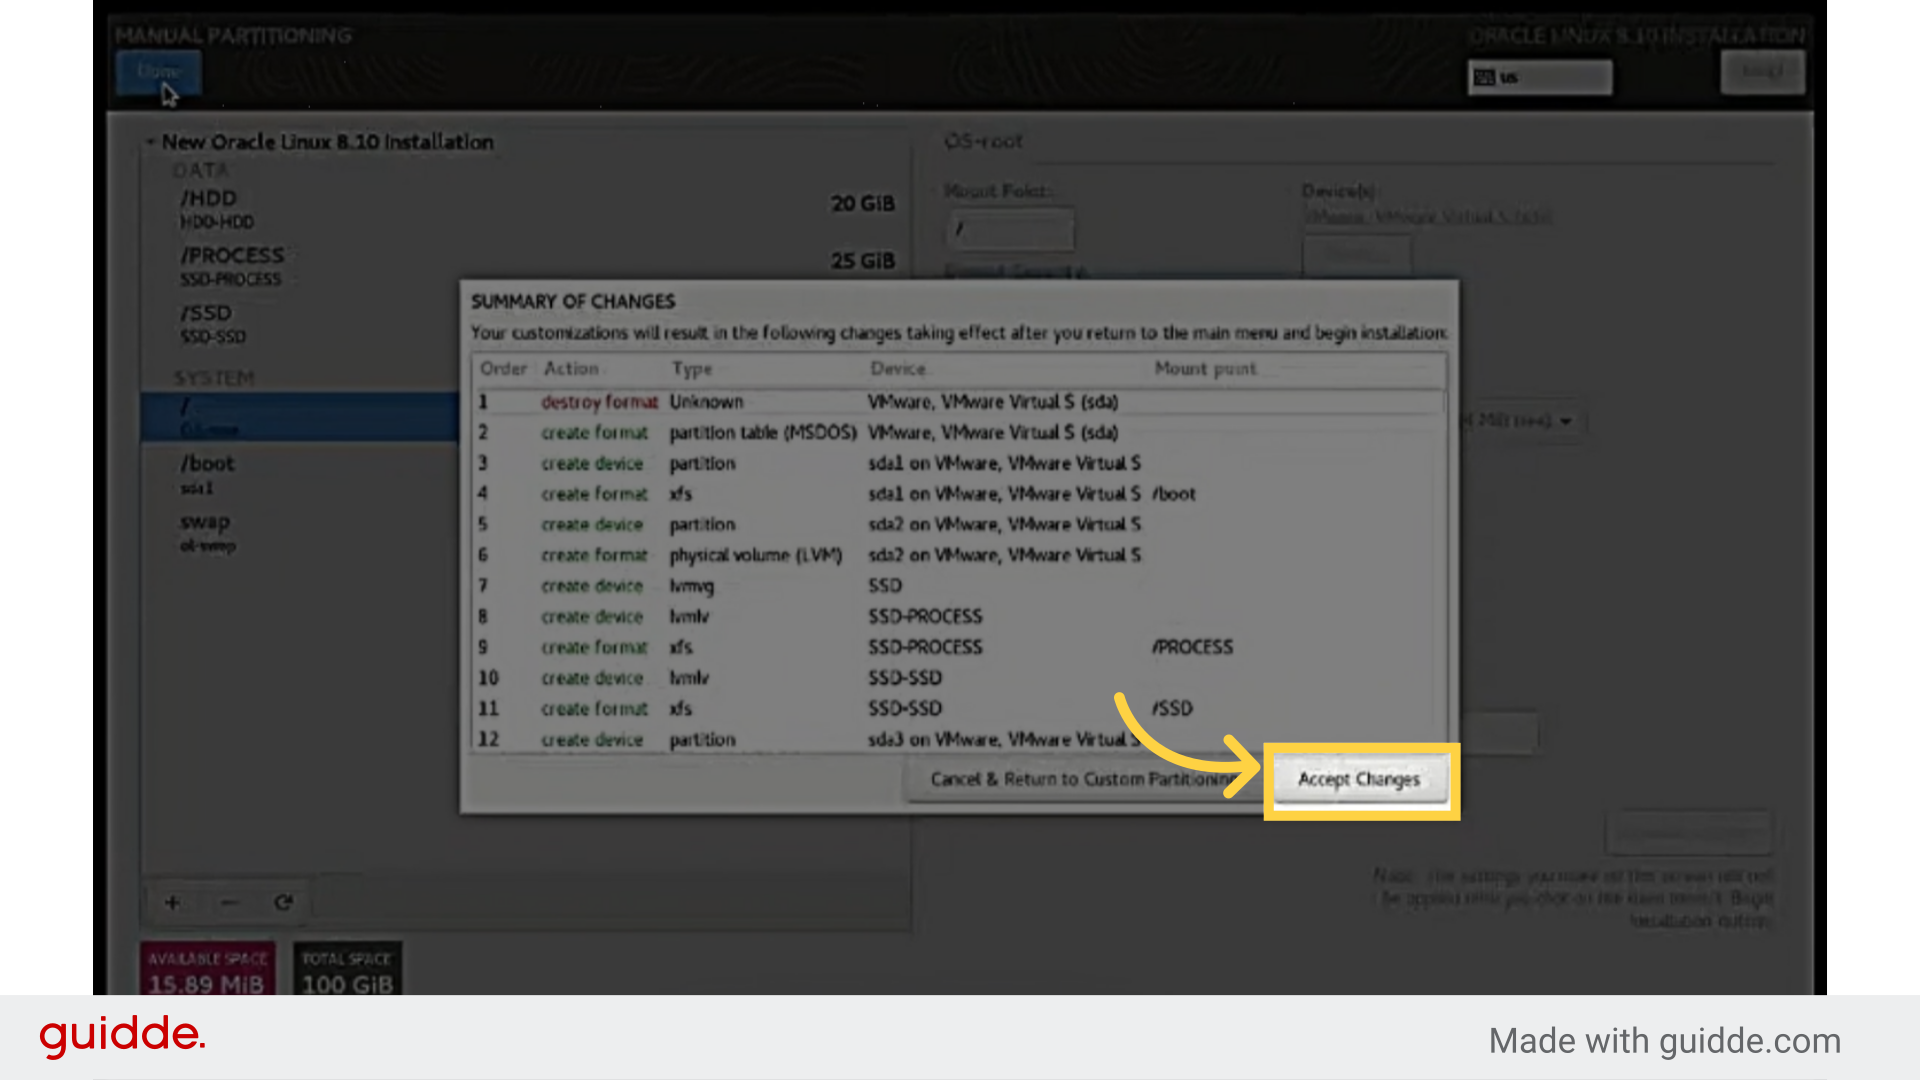
19. When partitioning is done, click 'Done'. Then, click 'Accept Changes' in the summary.
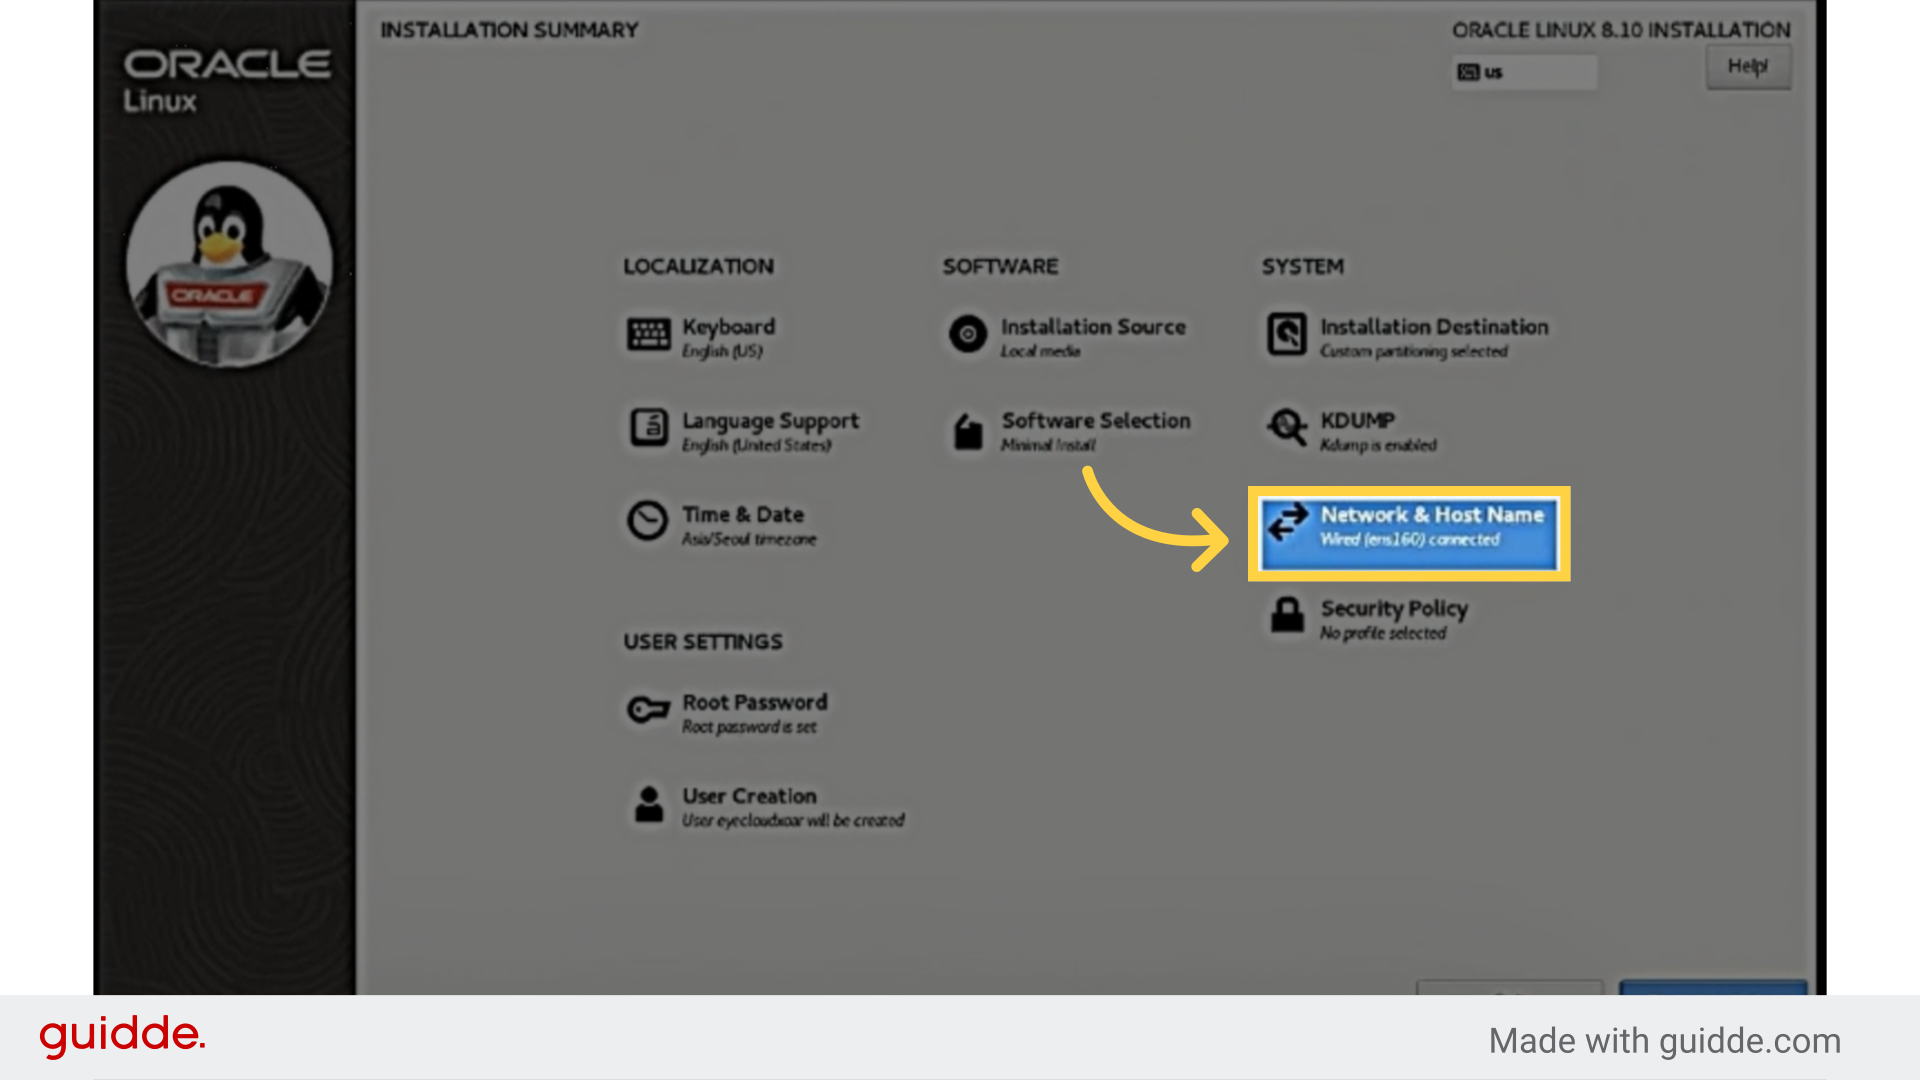
20. Let’s set up the Network & Host Name.
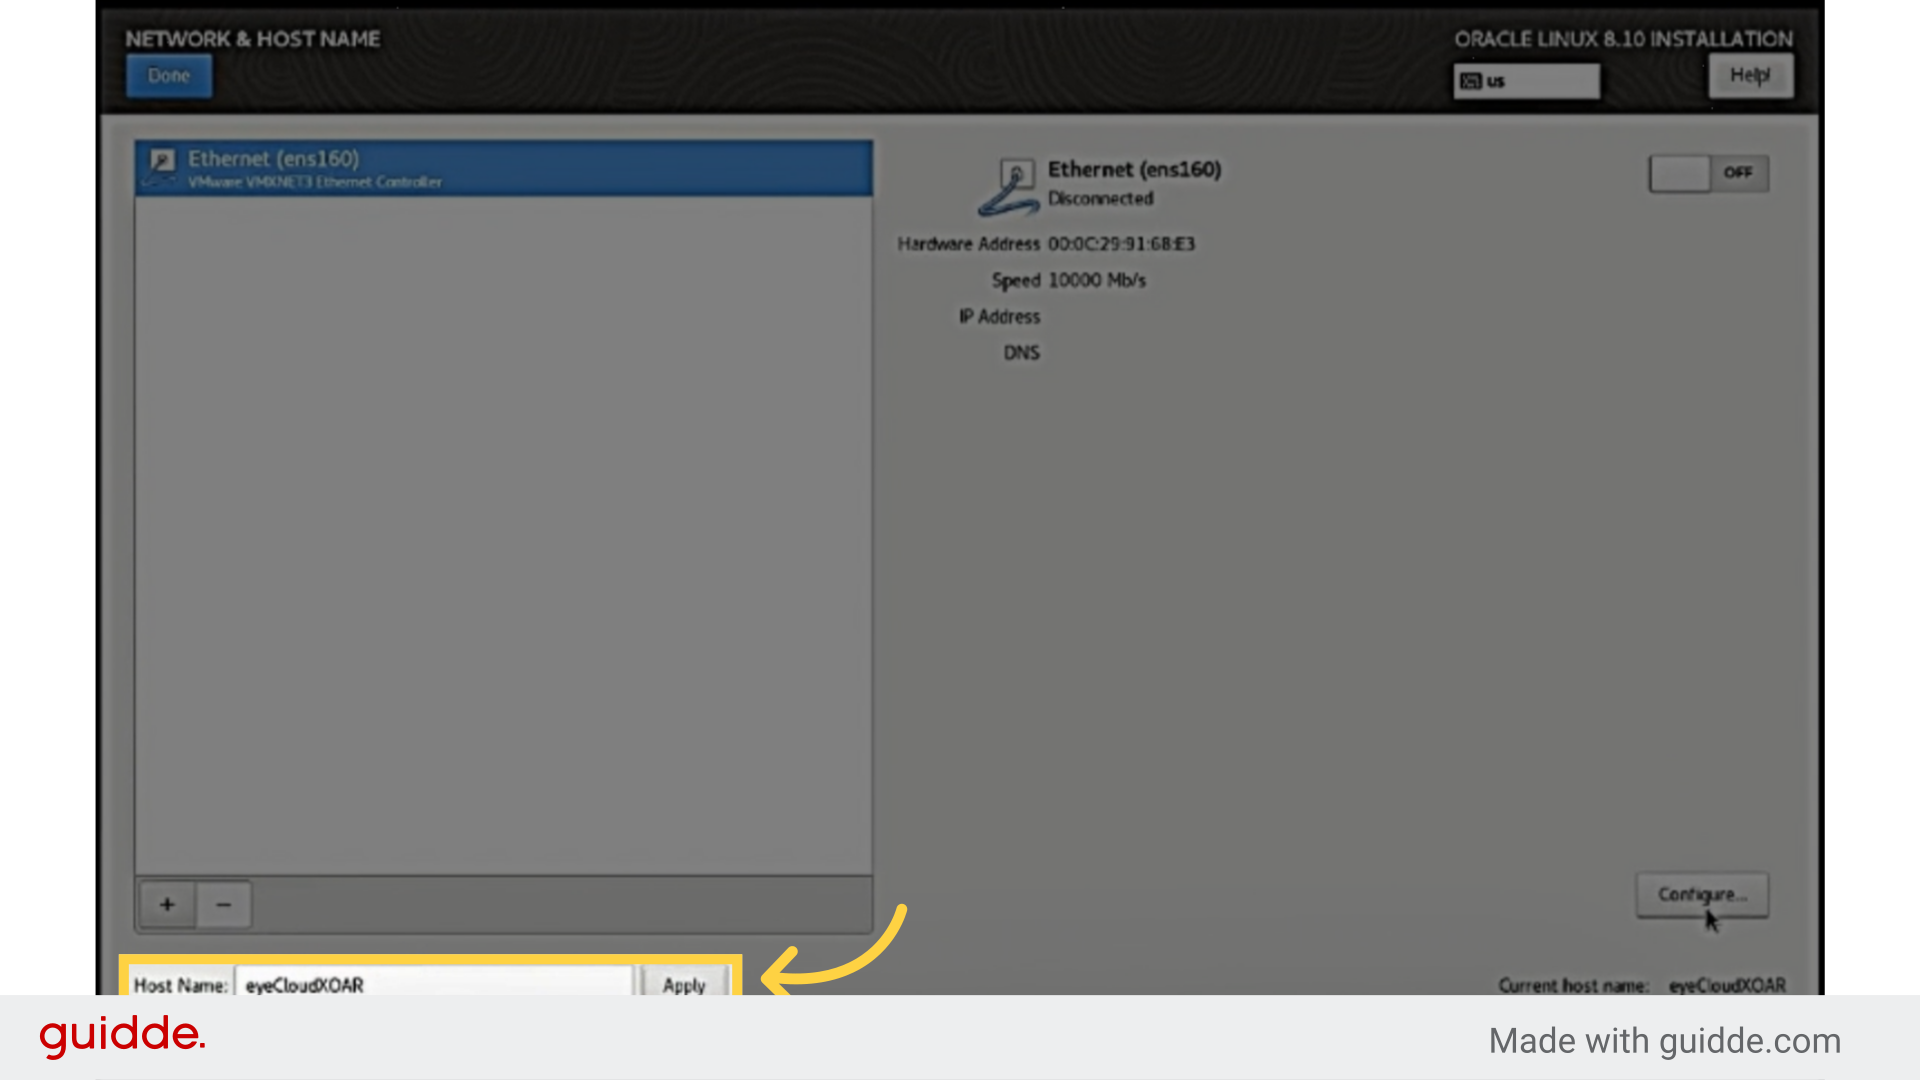
21. Inserting Host name and click Apply
22. Click Configuretion

23. Use your PC’s IP for Network & Host Name settings.
This is just a sample configuration.
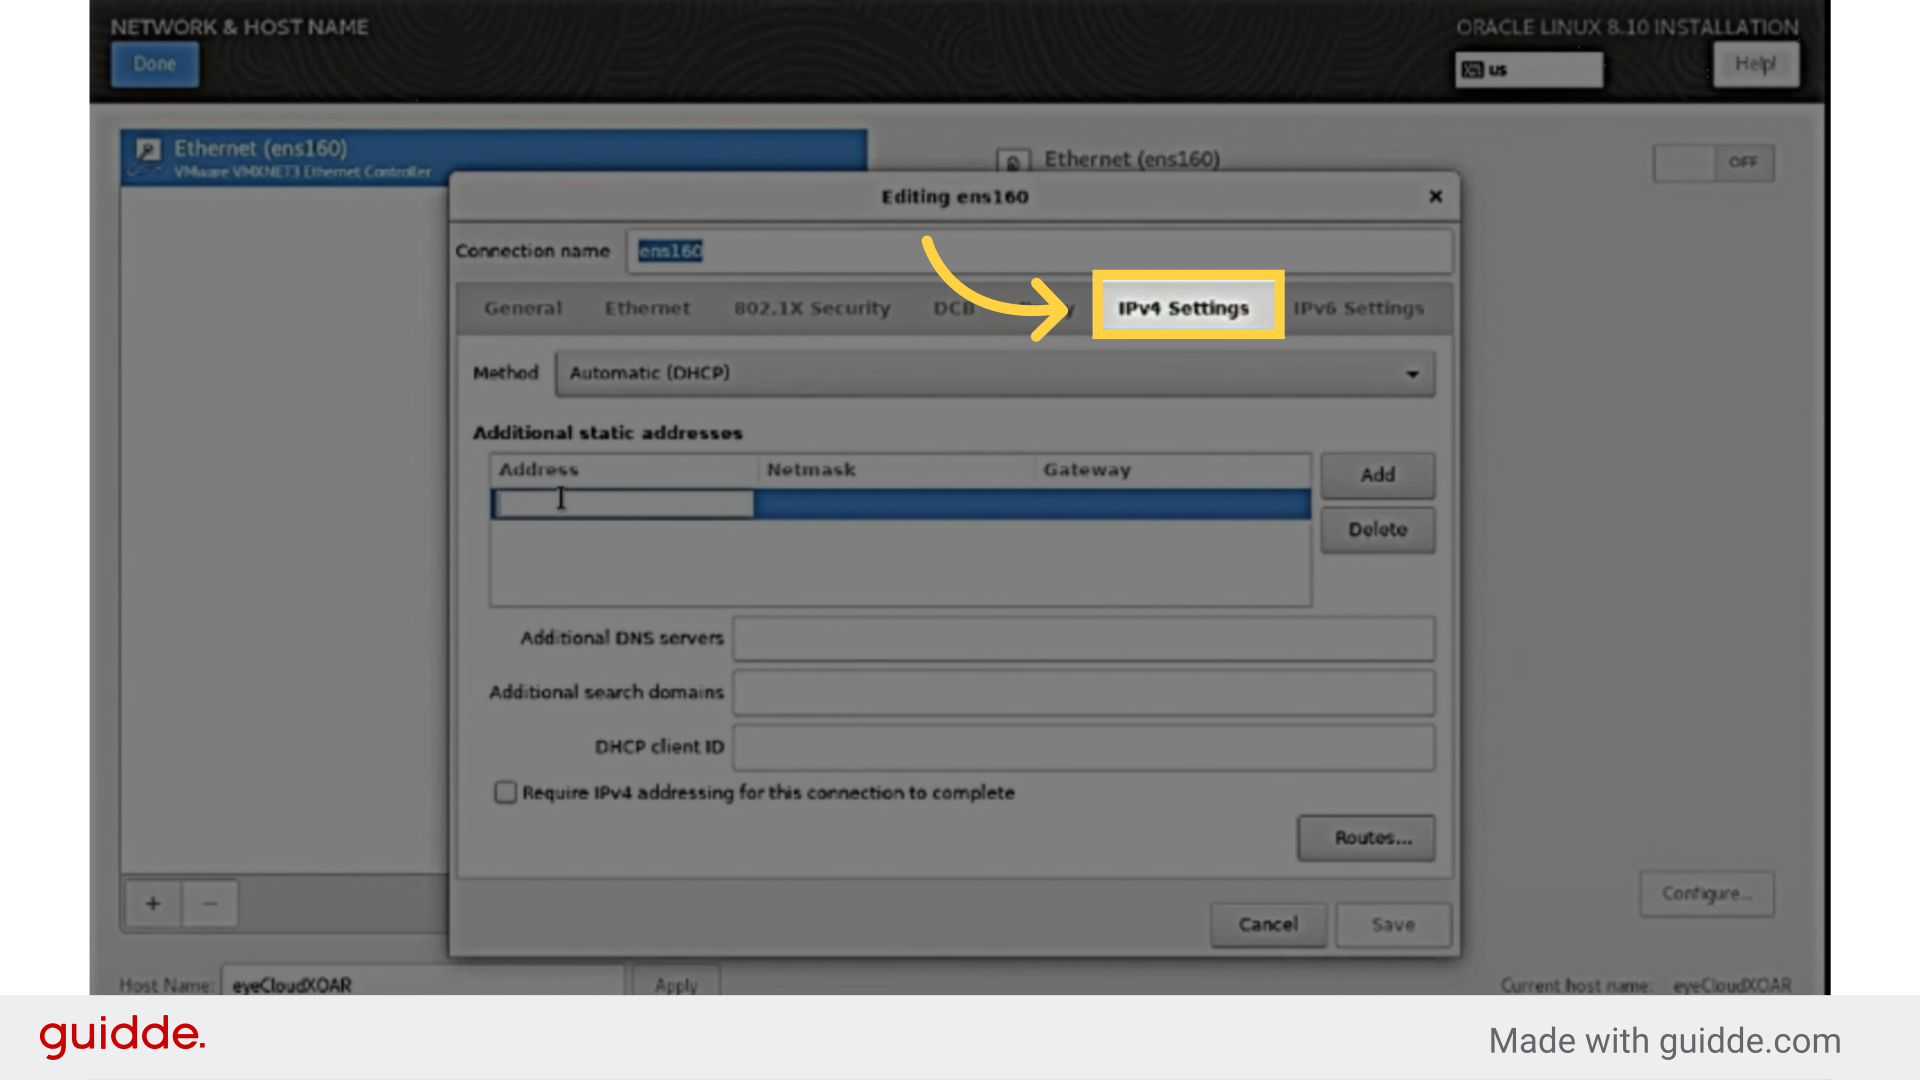
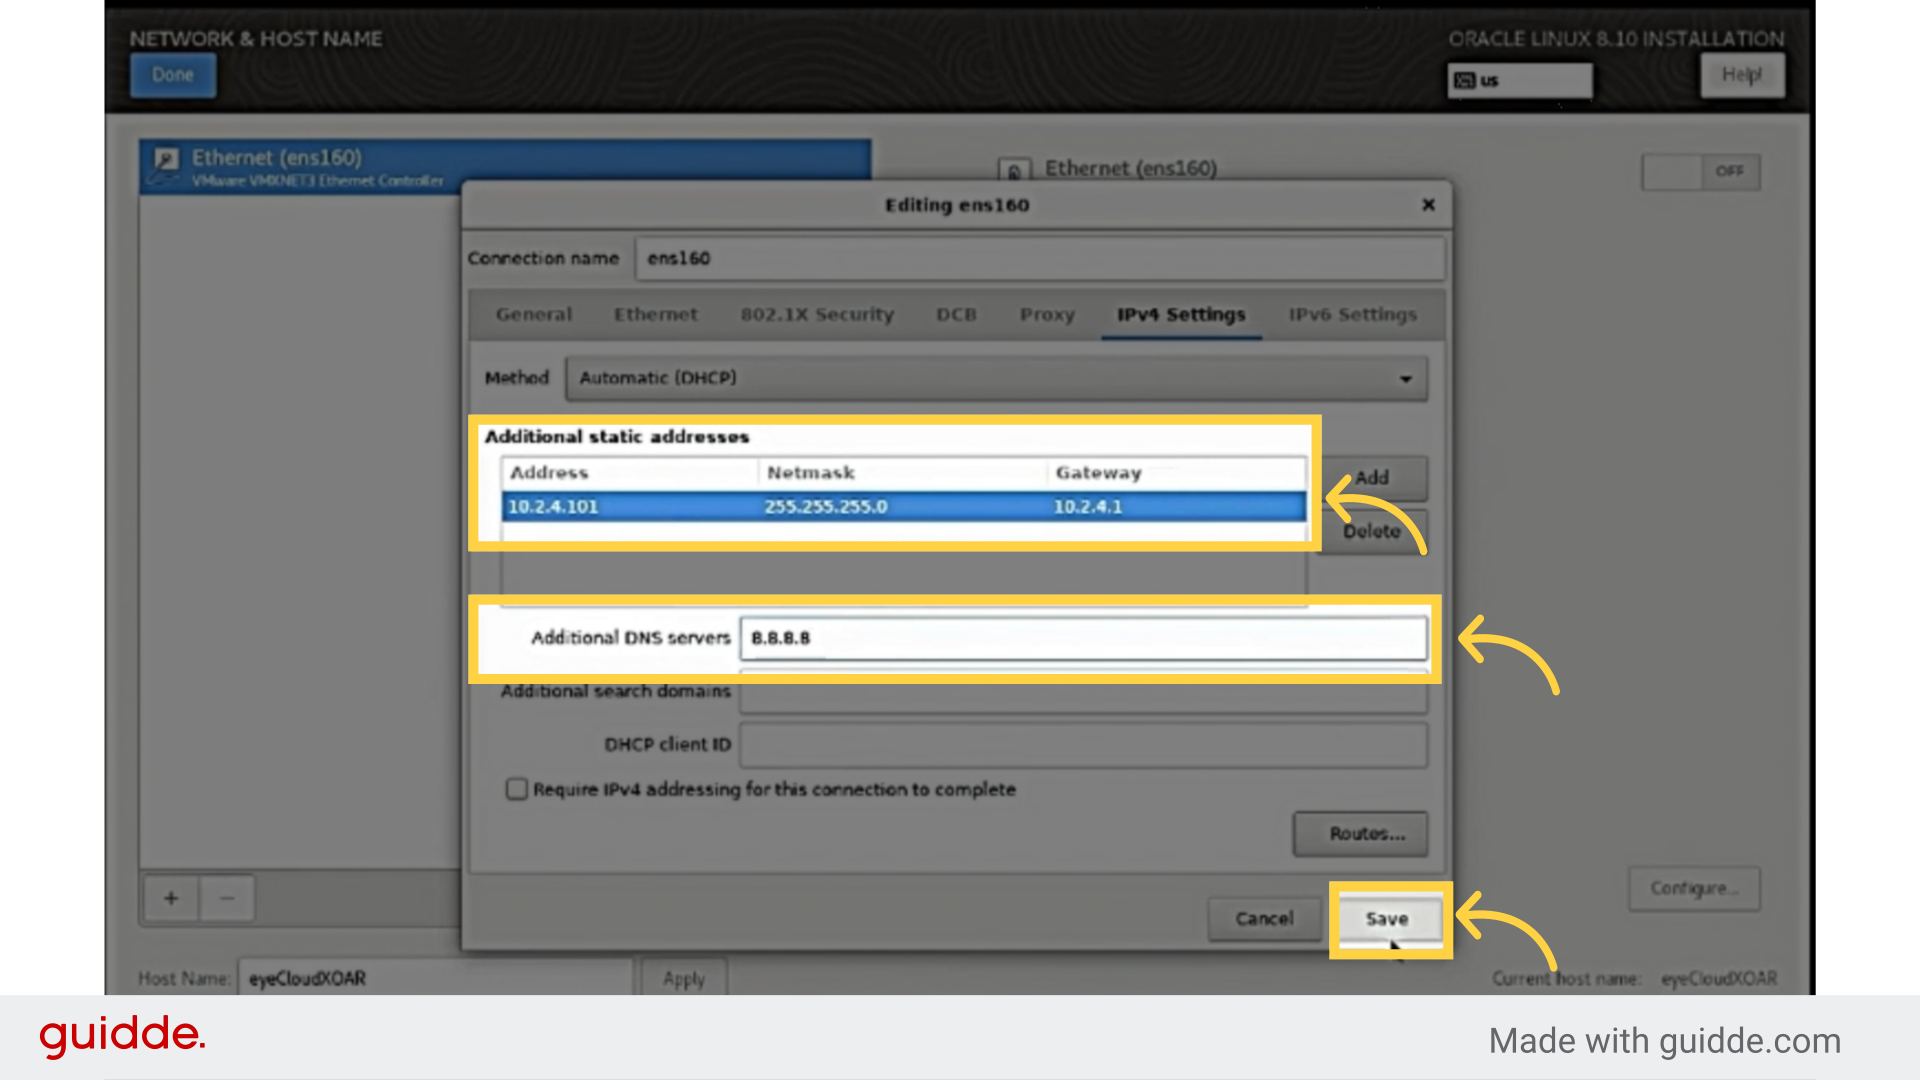
24. Enter ADDRESS, NETMASK, GATEWAY, and DNS.Then click Save
This is just a sample configuration.
25. Then, turn it on and check the connection. If connected, click Done

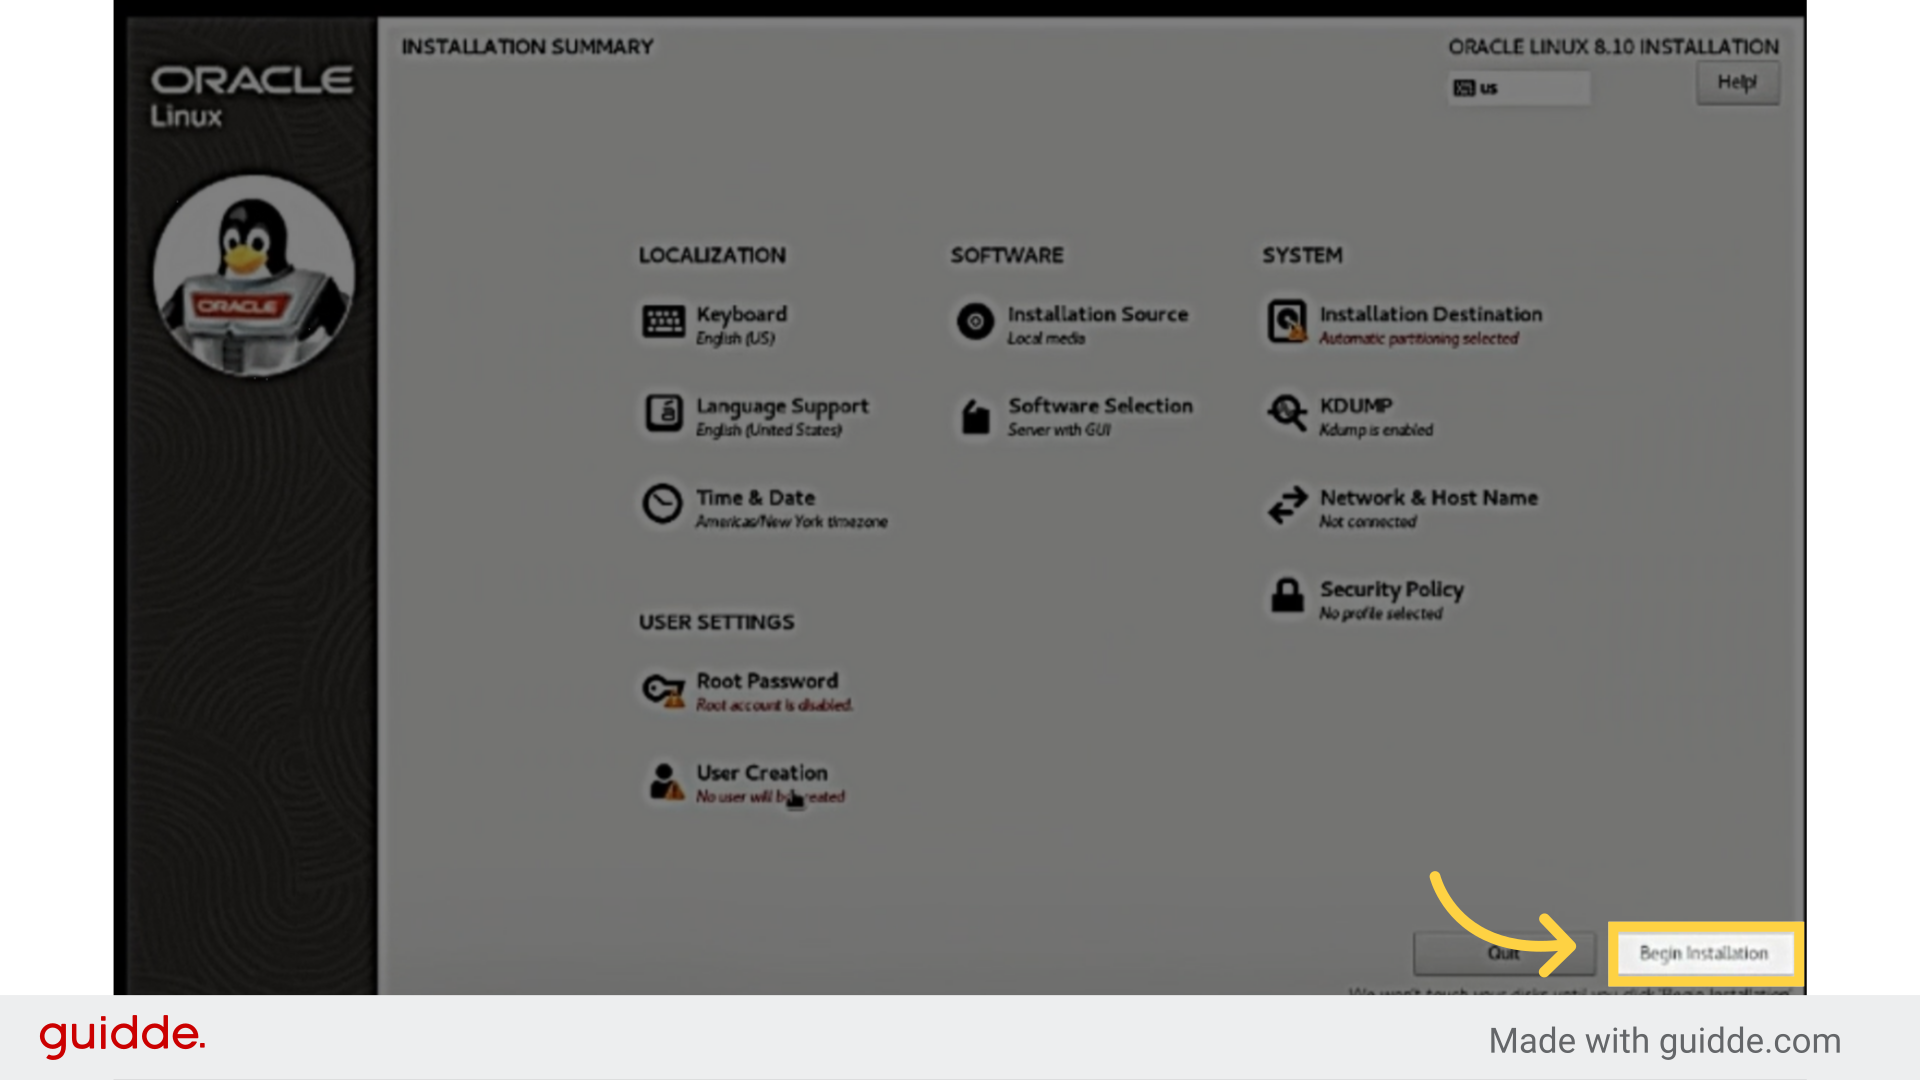
26. Then can Click Begin installation Installation may take over 10 minutes
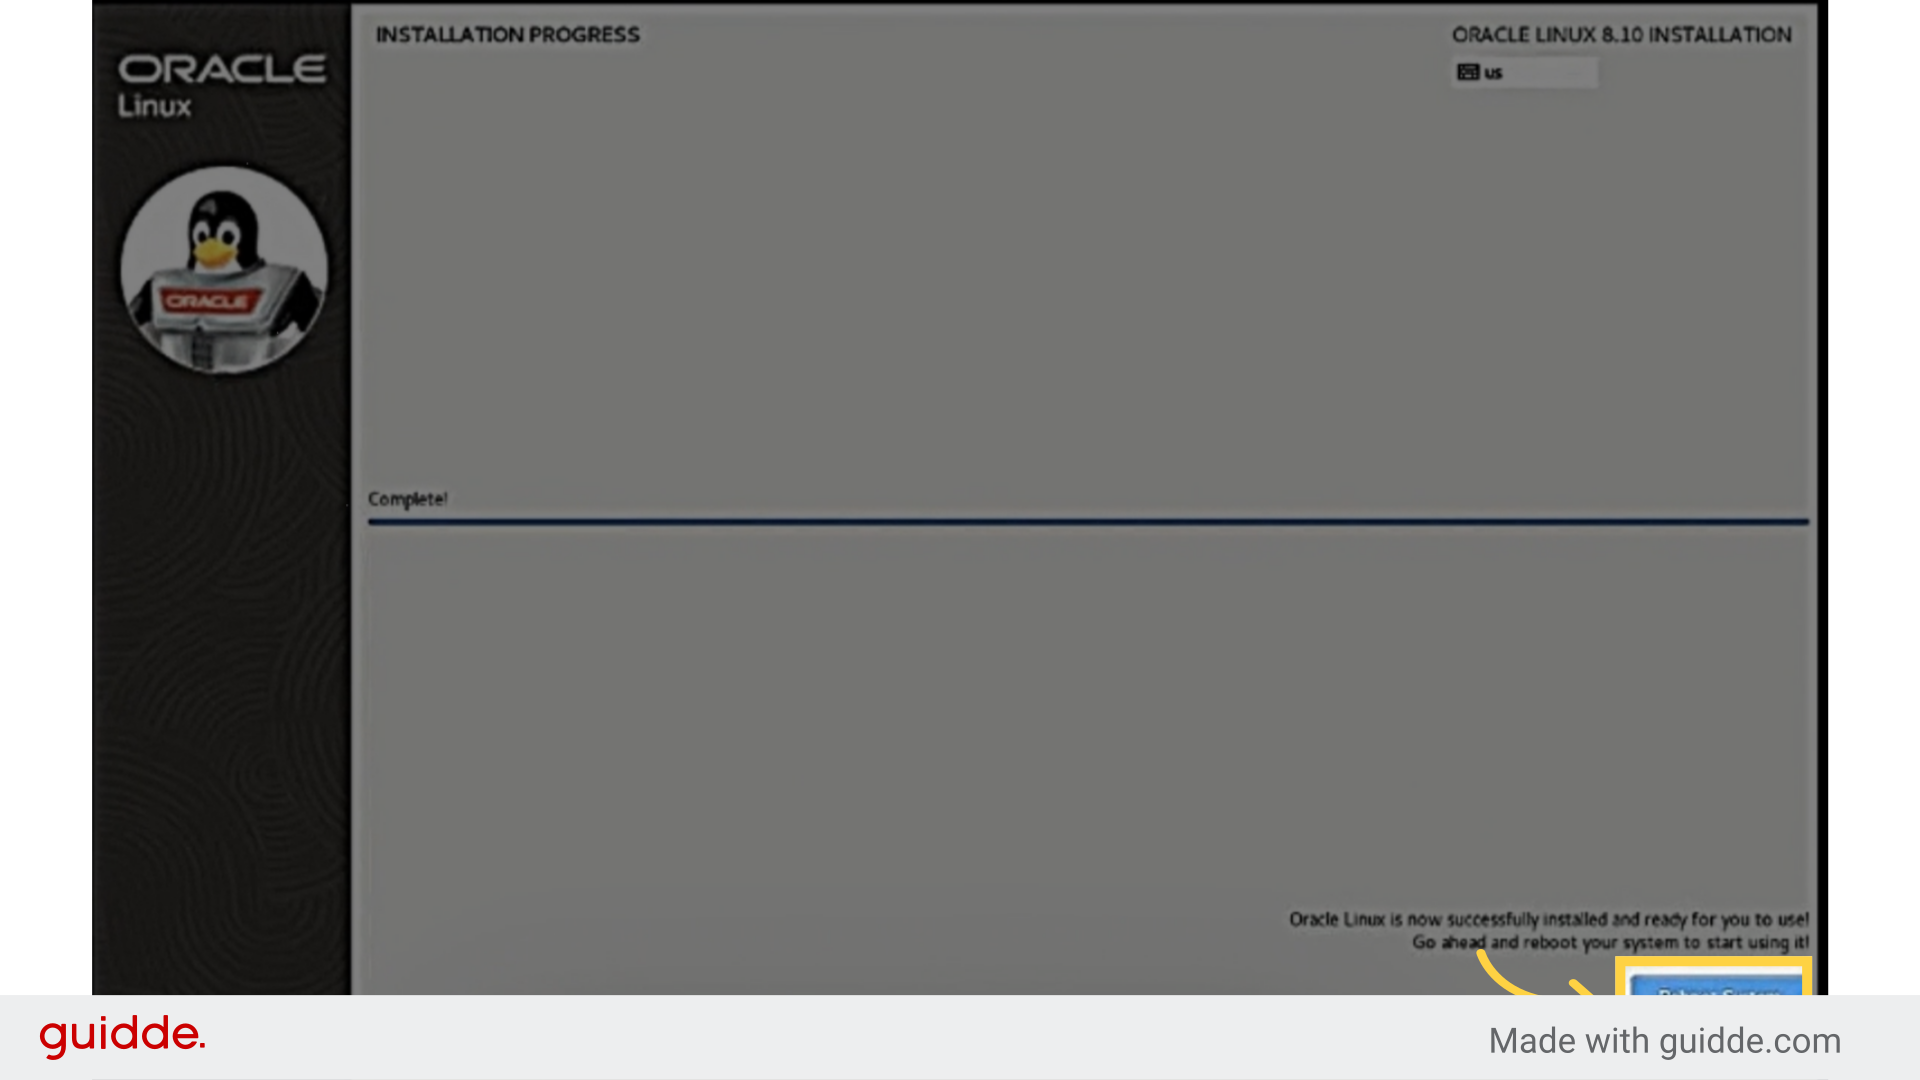
27. Once complete, click Reboot System
28. Thank You
This guide covered the steps required to manual PDF in chrome.